Embroidery hoop decorations are in style, so let’s learn how to use a hoop and some HTV to create an unforgettable gift. Honestly, this craft is so cute no one would blame you for making one to keep!
Valentine’s Day is a wonderful time of year- it’s a time to show your loved ones how much you care! And nothing says “I love you” more than a gift you’ve made yourself. Embroidery hoop decorations are in style, so let’s learn how to use a hoop and some HTV to create an unforgettable gift. Honestly, this craft is so cute no one would blame you for making one to keep!
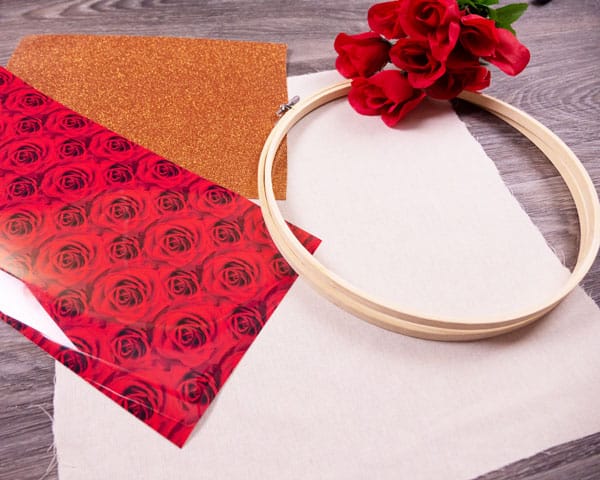
We marked this as beginner to intermediate because we used two different materials here. However, our cut file can easily be pressed as one material if you’re not comfortable with lining up two presses. Do whatever makes you comfortable at your skill level!
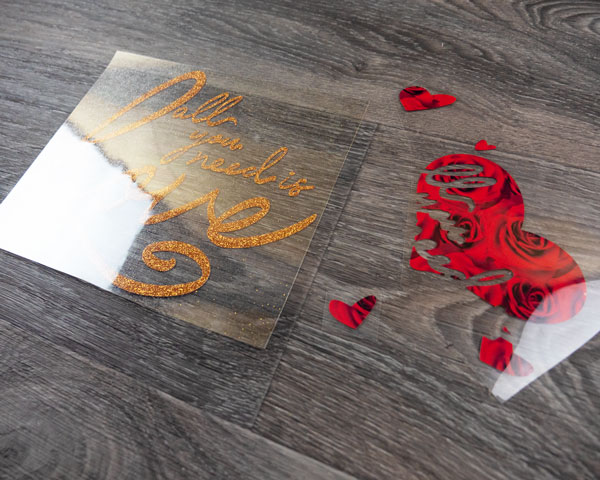
Step 1: Cut Out Your Design
Whenever you’re starting a new HTV project, the best thing to do is start by picking out or creating your design. The design dictates the material you use and is one of the most important parts of this process! Luckily for your, we’ve already created this cute hand-drawn cut file. And we’re happy to give it to you for free! Go ahead and download it at the link if you’d like, it’s available in both SVG and Studio3.
After you pick out your material, load up your cutter of choice and cut out the material. If it’s your first time using your Silhouette, check out our blog post on using a Silhouette Cameo! After you’re all cut and weeded, let’s move onto step 2.
Step 2: Cut Your Fabric
Before we get to pressing, first we need to cut down our fabric. If your fabric is already at a good length, you can go ahead and skip this step. But, as you can see, we have just a little too much fabric. In a few steps we’ll be hot gluing the extra fabric to the hoop for stability and to keep it neat. Because of that, don’t worry about cutting cleanly!
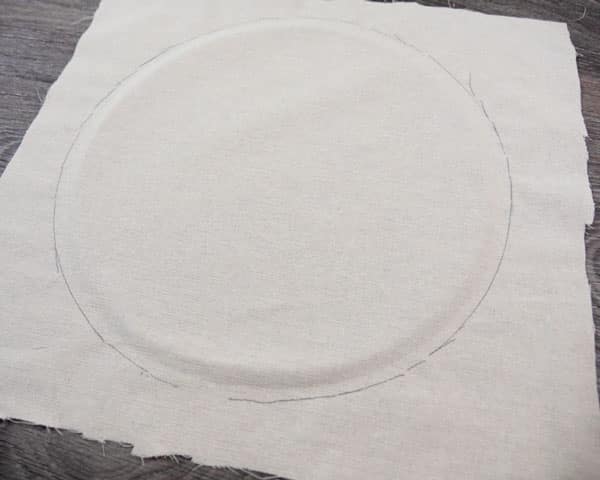
We want to make sure we still have enough fabric here to go into the hoop- if you just measure based on laying the hoop on top of the fabric you’ll end up with too small a piece! To make sure we had enough fabric to work with, we put the fabric into the hoop to mark it. We drew a line just past the furthermost ring on the hoop.
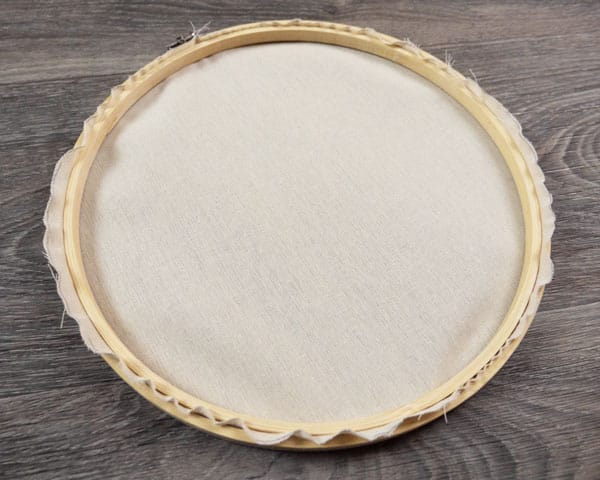
After that, cut out the circle. As you can see, we didn’t cut the cleanest circle but that’s perfectly okay! What matters the most is we have enough material. Test it out by placing it into the hoop. We have enough material and it looks good! Let’s move onto step 3.
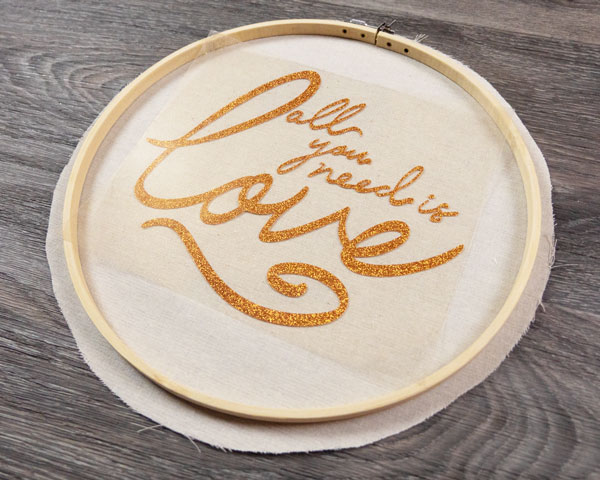
Step 3: Press Your Design
Now that we have our fabric and our HTV ready, it’s time to get that design pressed!
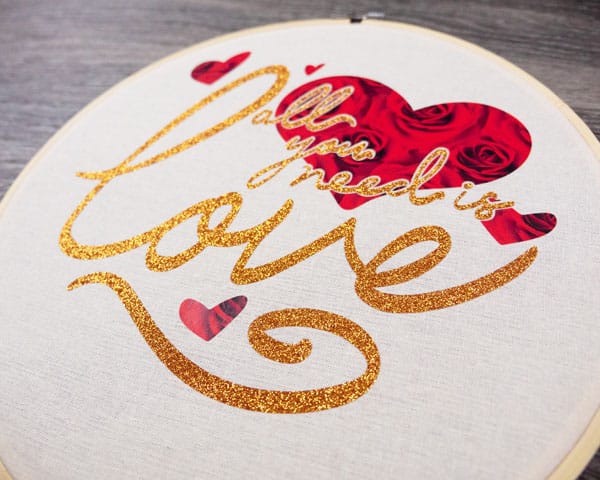
For this project, we’re using Rose ThermoFlex® Fashion Patterns and Dark Gold GlitterFlex® Ultra. We think these colors look stunning together and work very well with our Valentine’s Day theme. But with over 30 product lines and hundreds and hundreds of colors and patterns, the combinations are endless! Take a look through our catalog and see what strikes your fancy.
It’s important to first layout your design so you know exactly where it needs to go on your fabric. To get a good idea of placement, we laid the hoop on top of the fabric and used this to eyeball where we wanted it. Once you have it where you want it, press!
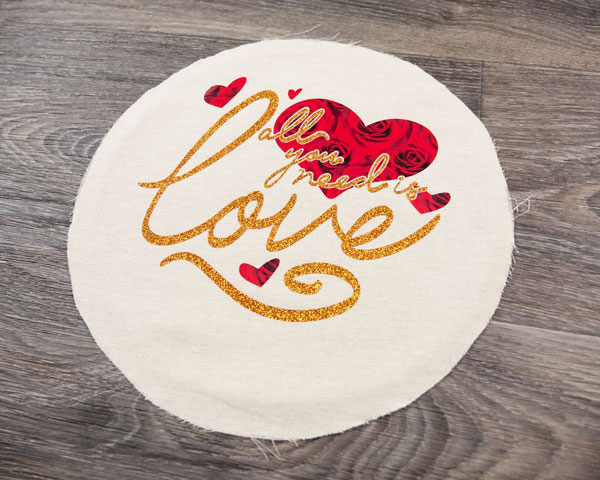
For GlitterFlex® Ultra, you press at
Temp: 320° F
Time: 5* sec
*Did you notice that’s less time than usual? That’s because we’re doing two presses! With our next press, the GlitterFlex® Ultra will get all the time and heat it needs.
Next we press ThermoFlex® Fashion Patterns at
Temp: 320° F
Time: 15 sec
And there we have it! One perfectly pressed piece of fabric. We’re almost done!
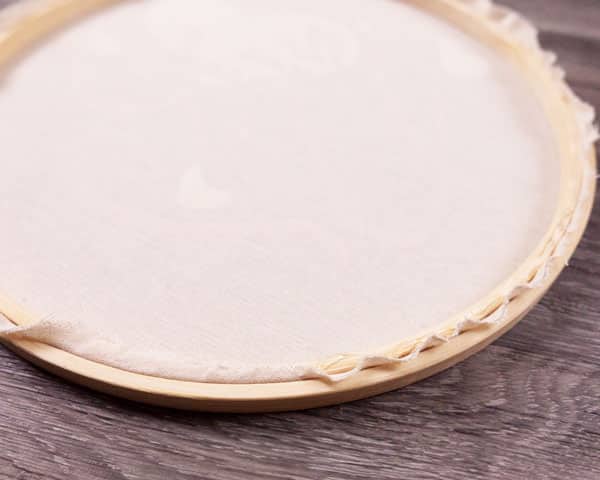
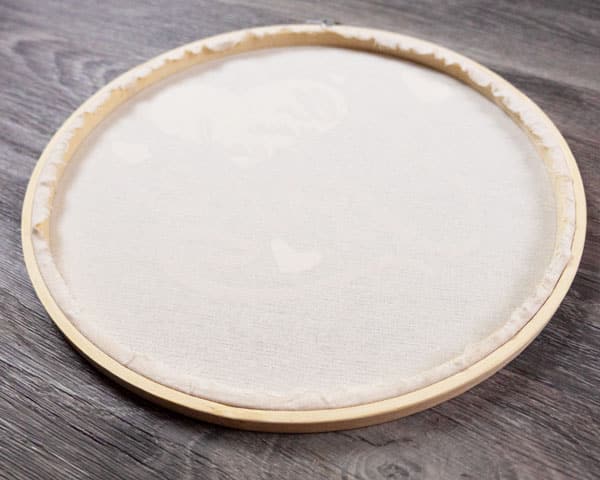
Step 4: Glue the Fabric to the Hoop
We’re almost finished! All that’s left to do is to put the fabric in the hoop and glue down the loose ends.
Place you fabric in the hoop. Here we need to make sure the fabric is TIGHT. This makes sure there’s no slack after we’ve got everything glued down. And a wibbly wobbly canvas isn’t cute! We find it helps to get the fabric into the hoop and tighten the knob up top a little bit. Then pull at the fabric, making it tight. Tighten the knob up some more and it’s perfect!
After it’s as tight as you can get it and the image is where you like on the hoop, get the glue gun out. Once the glue is nice and hot, add a thin line of glue on the interior hoop. Press the extra canvas into the hot glue. PLEASE be careful here- we don’t want any burned fingers!
After everything’s glued down, it should look something like this! Now everything will stay tight, in place, and out of the way.
And we're done!
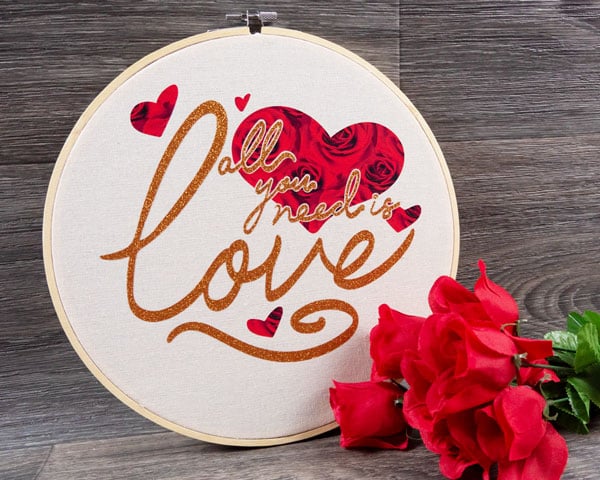
Turn over that gorgeous lil hoop and admire your handiwork. Isn’t it amazing? This would look stunning in any house! Anyone would be so excited to get this as a gift. After Valentine’s Day is over, you can use the steps here to make any sort of embroidery hoop decoration! Why not stain the wood of the hoop next time? Change up your fabric? The possibilities here are endless!
We hope you found this tutorial helpful and that soon you’ll be creating your own decorative embroidery hoops! Please let us know what you think by messaging us on Facebook. Made a decorative embroidery hoop using this tutorial? Tag your picture #lovewhatupress so we can see it! We might even feature it on our social media.
We hope you give this a try! We know that with this fun tutorial and our amazing line of HTV you’ll
Lovewhat you press! ®
Like this blog post? Share it with friends!
Subscribe to our Mailing List
Want to be in the know about our latest products and colors? Sign up for our mailing list!