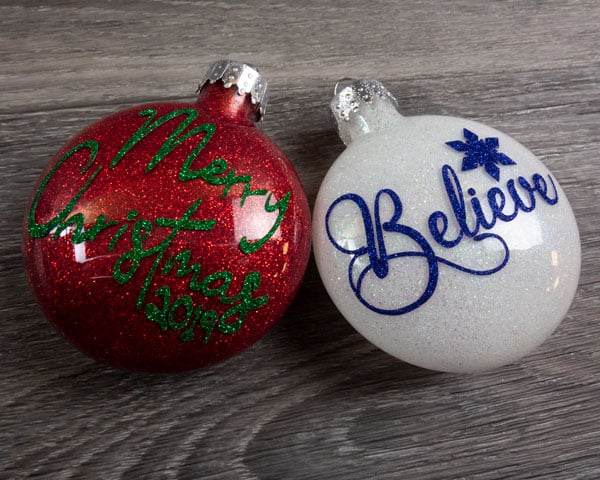
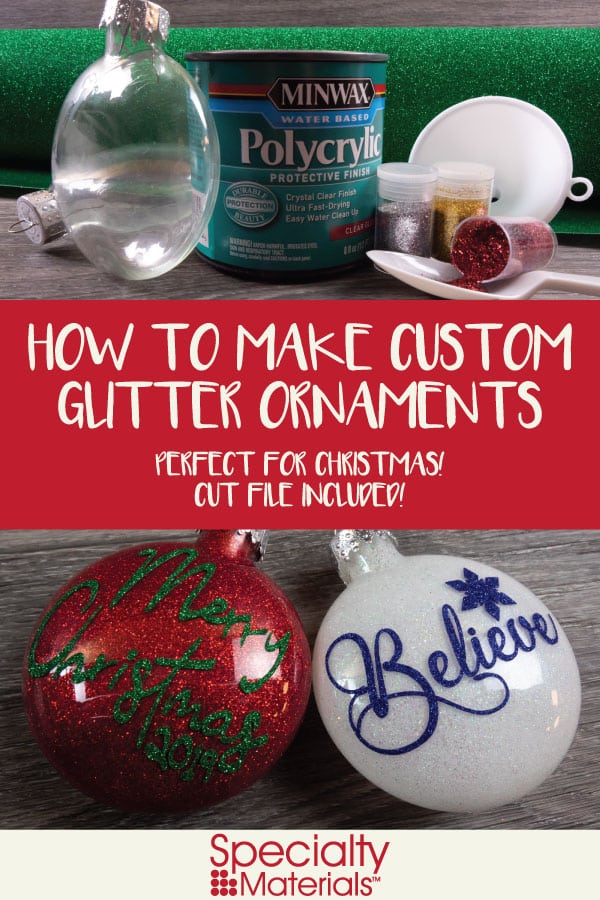
With Christmas right around the corner, it’s time to start thinking of decorations. One of the easiest things to customize are ornaments and with this how to, you’ll be making them in no time! Creating your own custom ornaments is not only easy, but they look stunning. You’ll have people asking where you bought them, not how you made them!
Transfer Mask (Here we used transparent duct tape)
We marked this as beginner to intermediate simply because of the weeding- small, detailed designs will be much harder than large, chunkier designs. If you’re new to sticker vinyl, we recommend you stick to an easier to weed design! With that said, let’s get started!
Step 1: Cut Out Your Design
First we’re going to start with picking out a design. Once you have your design picked out, that helps you pick out your color scheme. Luckily, with Pressure Sensitive GlitterFlex® Ultra there are over 40 color options! Whatever color scheme you have in mind, Pressure Sensitive GlitterFlex® Ultra has a color for you.
We’ve created two different designs for this- both are available for free on our Free Cut File page! They’d also look cute on a shirt so you can save them for later. 😉
Once you’ve got your design and your color of Pressure Sensitive GlitterFlex® Ultra picked out, it’s time to cut the design. First, measure your ornament. We picked out a flatter, wider ornament to make it easier to place our Pressure Sensitive GlitterFlex® Ultra. This gave us about 2 1/2 inches wide of workable space. Size the file to how large you need it and cut.
With sticker vinyl (aka pressure sensitive vinyl), ALWAYS cut right reading. Unlike HTV, which we always cut in reverse! We’re going to mask this for our transfer later.
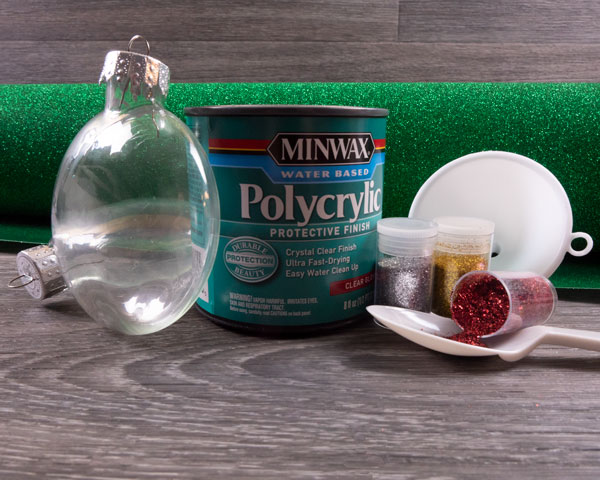
Step 2: Coat the Inside of the Ornament with Polycrylic
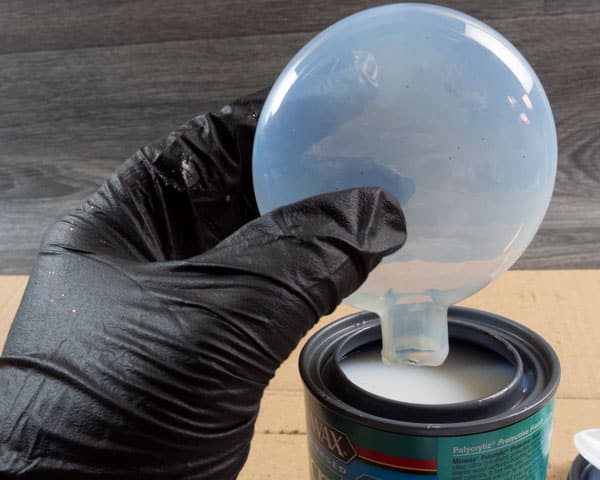
Now that we have our Pressure Sensitive GlitterFlex® Ultra cut out and weeded, it’s time to glitter up these ornaments! To get that started, we need to coat the inside of the ornament with an adhesive.
There are some floor cleaners that can be used to a similar effect, but it can cause discoloration in the glitter in the future. That’s why we went with polycrylic- it’s going to adhere our glitter without messing with our glitter. We’ve got gorgeous glitter, we want to see it!
Make sure you have some sort of protective layer between yourself and the table- here we used some leftover cardboard. You could also use old newspaper. This stuff is drippy and it’s much easier to clean up this way! We also wore gloves- just a personal choice knowing how graceful our crafter is. 😉
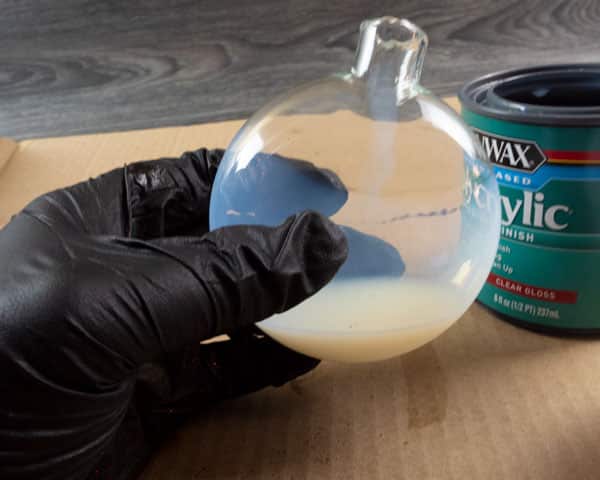
To help minimize mess, we used one of our funnels and a disposable spoon to get the polycrylic inside of the ornament. Don’t worry about overfilling- if there’s leftover, we’ll drain it later. We filled it up about 1/4-1/5 full. Once you have a decent amount in there, it’s time to swirl! Swirl the ornament around until the entire inside is evenly coated, like the picture on the right.
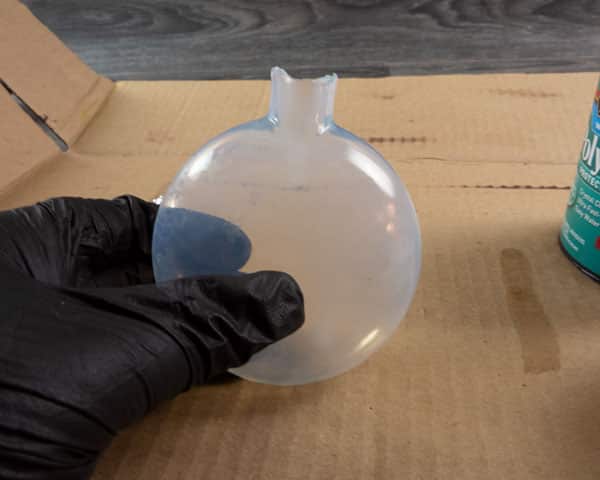
After you’ve got the inside evenly coated, it’s time to drain! This helps ensure there isn’t any extra polycrylic pooling on the inside. We got a disposable bowl and propped it upside down to let it drain. There are many other ways you can do this- like using old egg cartons or disposable cups! Once you feel you’ve allowed all the excess to drain, it’s time to glitter this ornament up.
Step 3: Add Glitter to the Inside of the Ornament
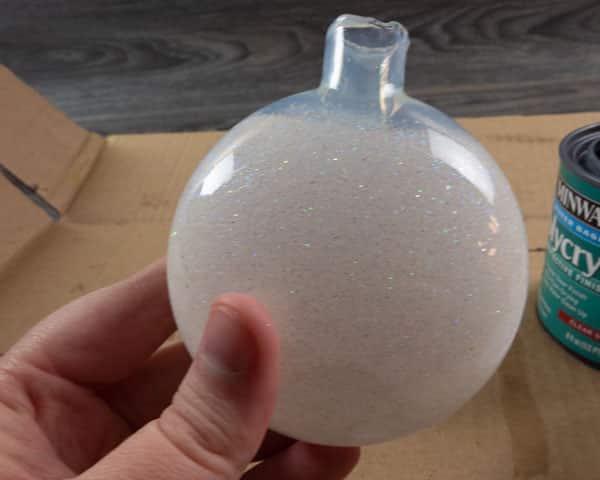
Now it’s time for the glitter! To coat the inside, grab a second funnel and the glitter of your choice. Add a bunch of glitter to the inside and, like before, swirl! Don’t worry about adding too much glitter, the glitter that doesn’t stick we can tap out and use later. You’ll be VERY thankful for your newspaper or cardboard right about now, because even with the most careful hands glitter will STILL manage to go just about everywhere.
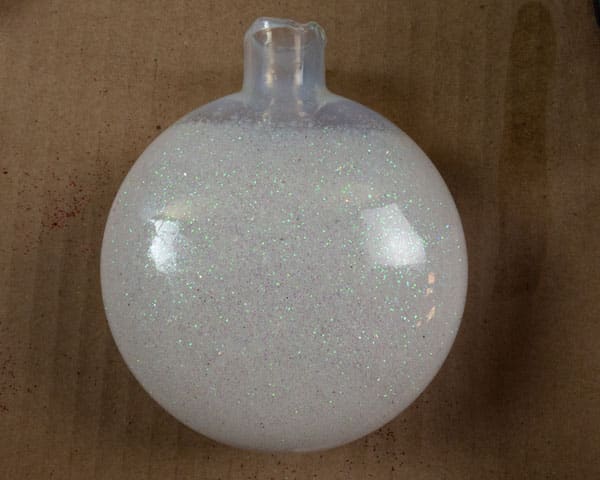
This process goes very fast- both times we made an ornament we had swirled the glitter and had it nearly fully coated before we remembered to take a picture of it half swirled! 😱 The top can be a bit tricky to get, but be patient and don’t be afraid to add more glitter if you need to. We found while you’re tapping out excess glitter you can get the top bits just fine. And if it’s not as evenly coated, many ornaments will cover most, if not all, of the top. We recommend letting it dry for a bit before adding the cap back on but, full disclosure, we got too impatient and added it back immediately. There are some small areas where you can see the inside wire but otherwise everything worked out fine!
Once we have the ornament fully coated, put it aside and grab your Pressure Sensitive GlitterFlex® Ultra- it’s time to finish these ornaments up!
Step 4: Stick the Pressure Sensitive GlitterFlex® Ultra to the Ornament
We’re close to the finish line now! Grab your Pressure Sensitive GlitterFlex® Ultra because now it’s time to transfer it to the ornament.
There are a few ways you can do this-
By hand. If your design is one large piece, you can place it easily by hand! No transfer mask necessary.
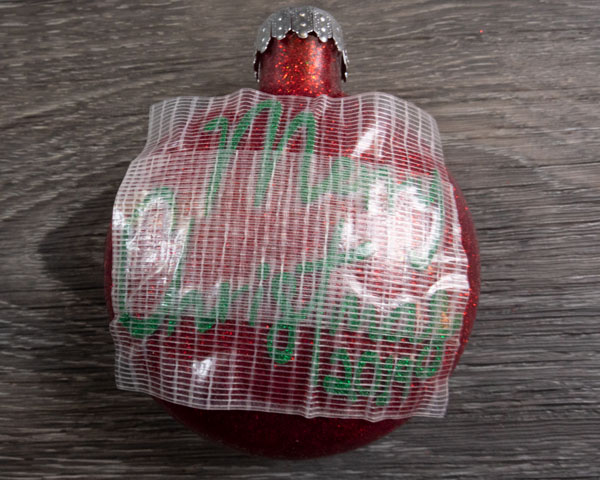
With a transfer mask. If your design has multiple pieces, a transfer mask will keep everything in place.
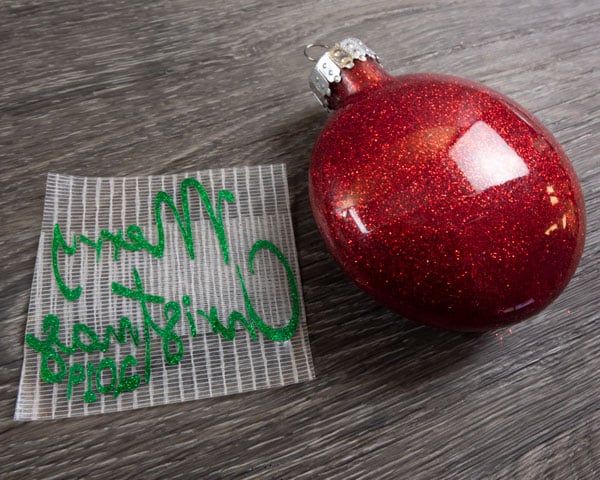
Here we used a transfer mask- it made it easy to keep everything lined up correctly. How you use a transfer mask is simple- lay the material over your Pressure Sensitive GlitterFlex® Ultra and pull it up so the Pressure Sensitive GlitterFlex® Ultra stays on the transfers mask and not the carrier. Now it’s ready to transfer!
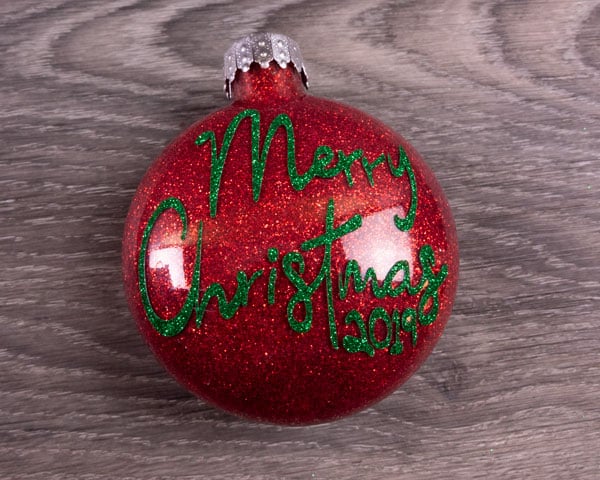
Place your design carefully- our ornament is flat so we were able to easily place our design. If yours is more rounded, something like an egg carton can help you keep your ornament from rolling around while you place your design. If you’re using a transfer mask, carefully peel it up, making sure the Pressure Sensitive GlitterFlex® Ultra adheres to the ornament. And with that, our ornament is finished!
And we're done!
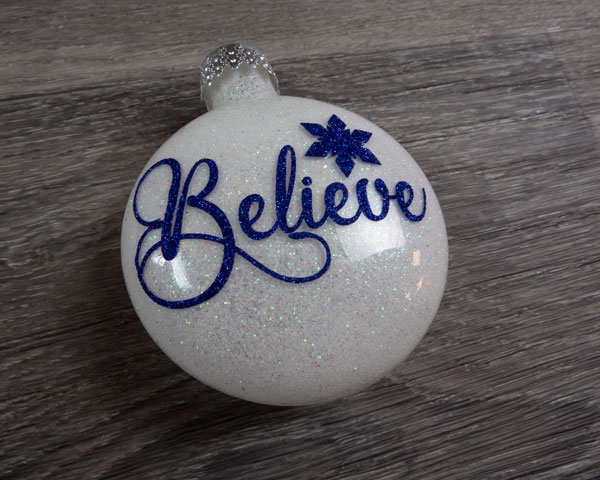
Wasn’t that super simple? Once you have the hang of this process, it’d be simple to make many ornaments in very little time. We created two different ornaments very quickly. The pictures look good but simply don’t do them justice- they’re even more gorgeous in person! You’ll absolutely love how these look on your tree.
We hope you found this tutorial helpful and that soon you’ll be creating your own ornaments! Please let us know what you think by messaging us on Facebook. Customize an ornament using this tutorial? Tag your picture #lovewhatupress so we can see it! We might even feature it on our social media.
We hope you give this a try! We know that with this fun tutorial and our amazing line of Pressure Sensitive GlitterFlex® Ultra you’ll
Lovewhat you press! ®
Like this blog post? Share it with friends!
Subscribe to our Mailing List
Want to be in the know about our latest products and colors? Sign up for our mailing list!