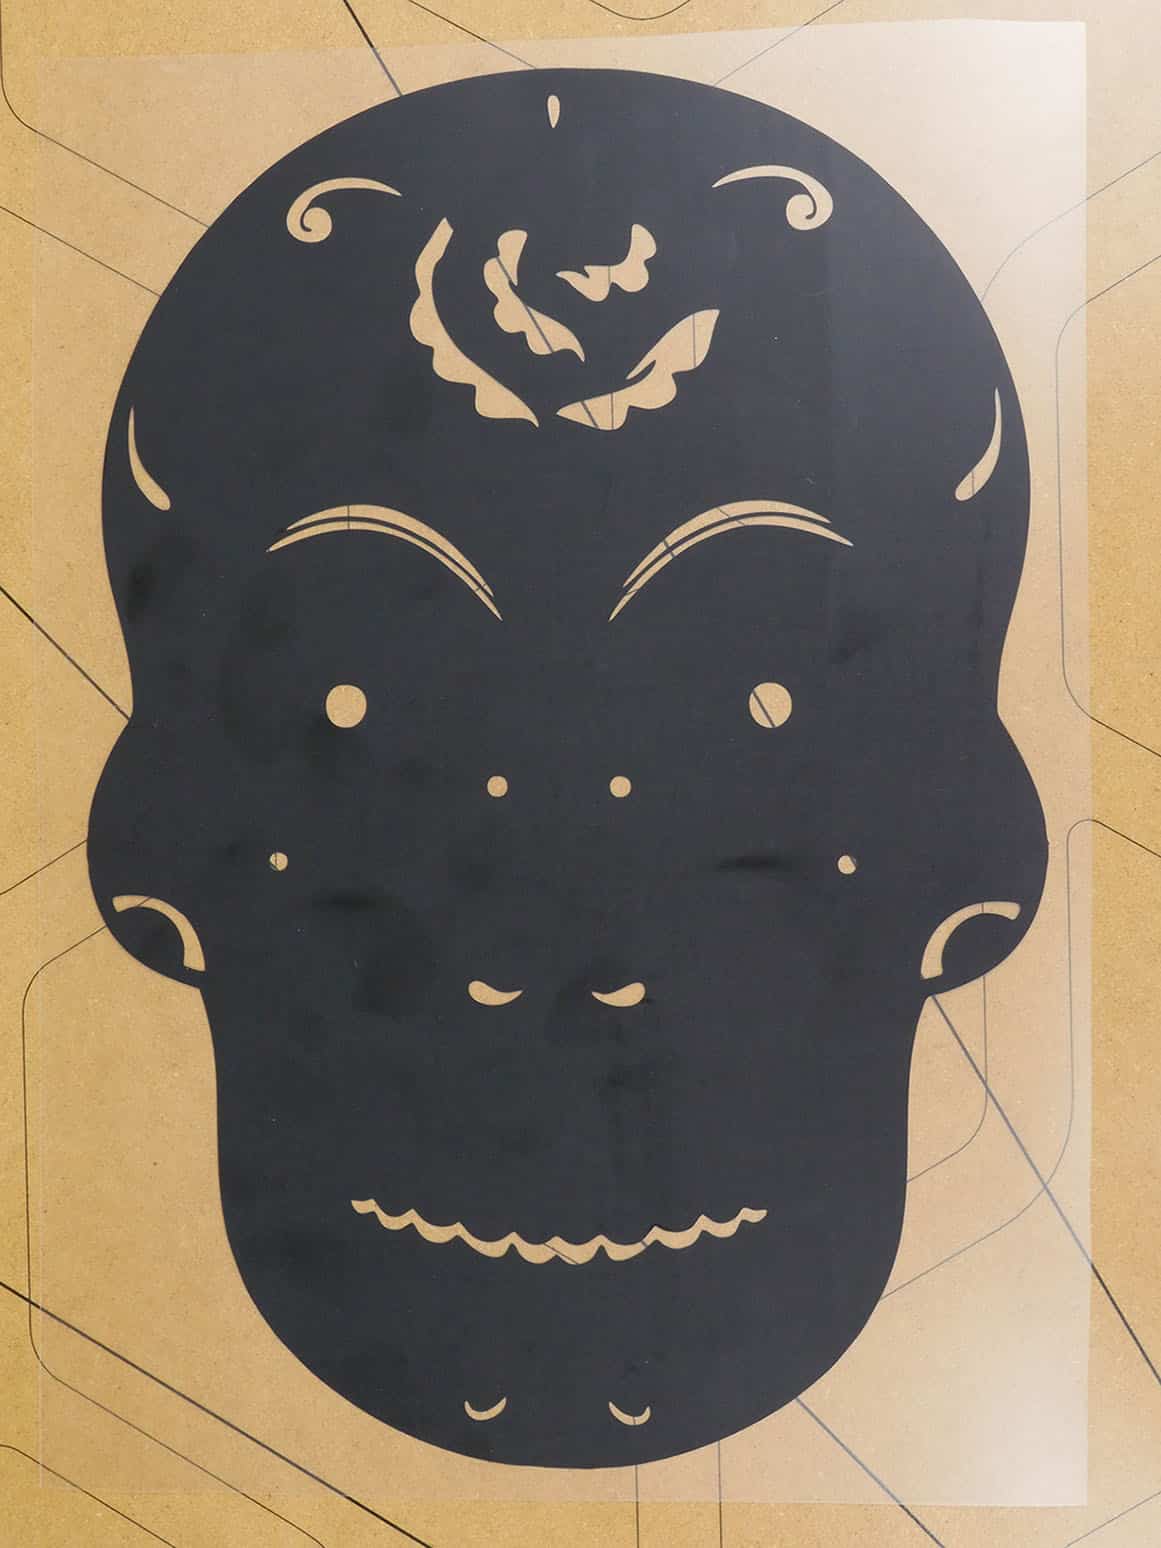
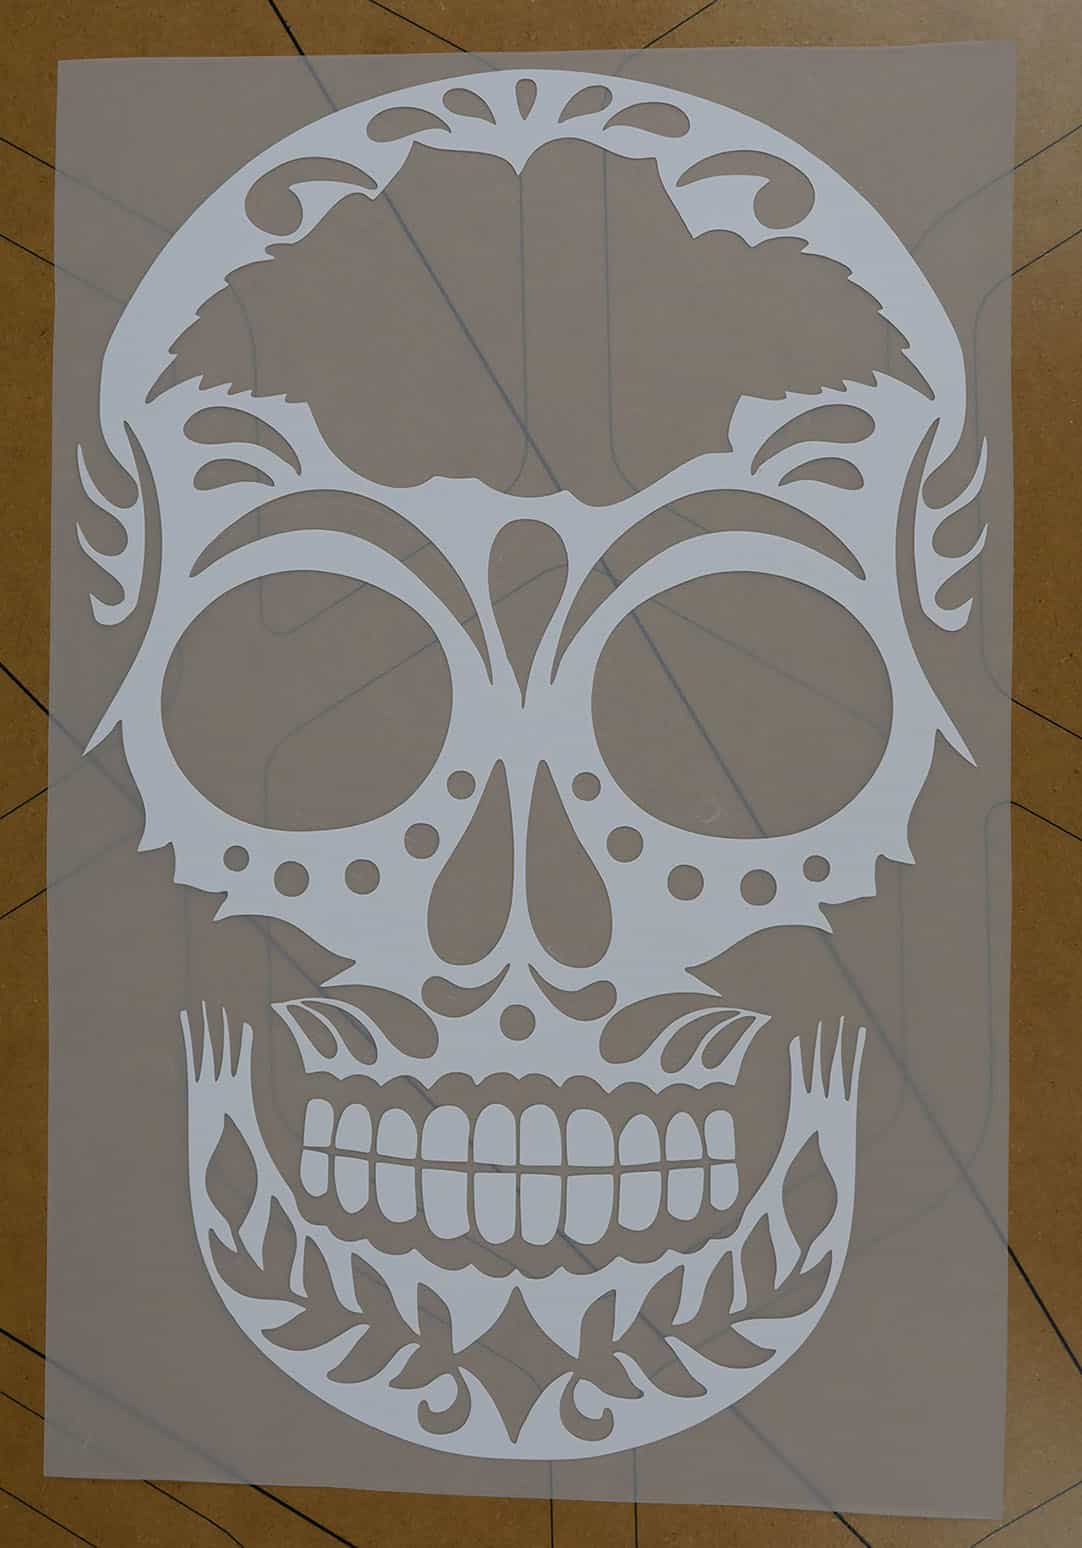
We have four different layers on this shirt- because we’re using a crimson shirt, we don’t need a Crimson layer of ThermoFlex® Plus. If you want to use a different color shirt but still get the red, the cut file does also include the crimson!
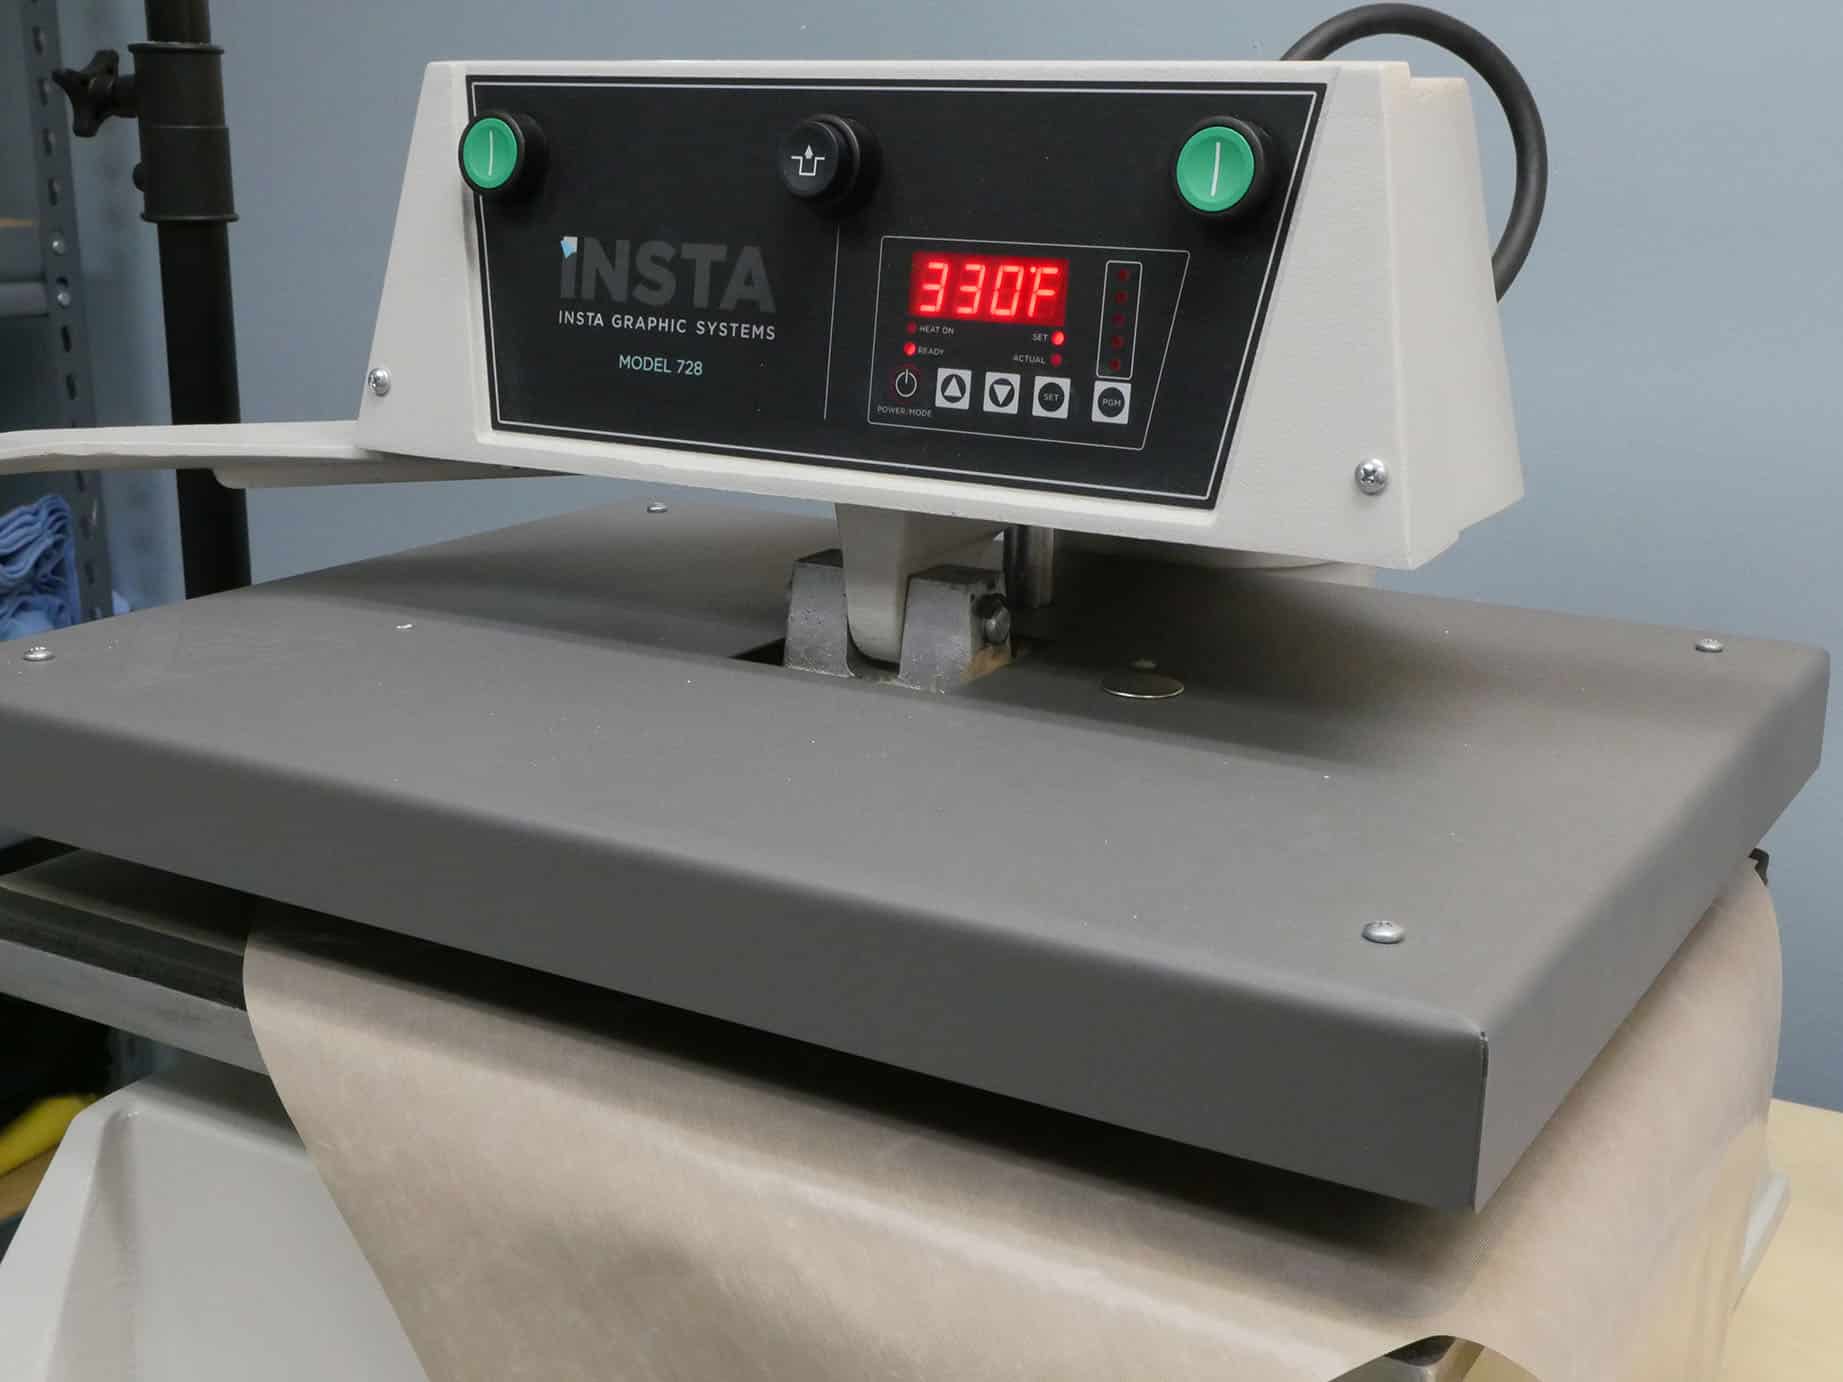
Now that we have this all cut and weeded, let’s get our press heated up!
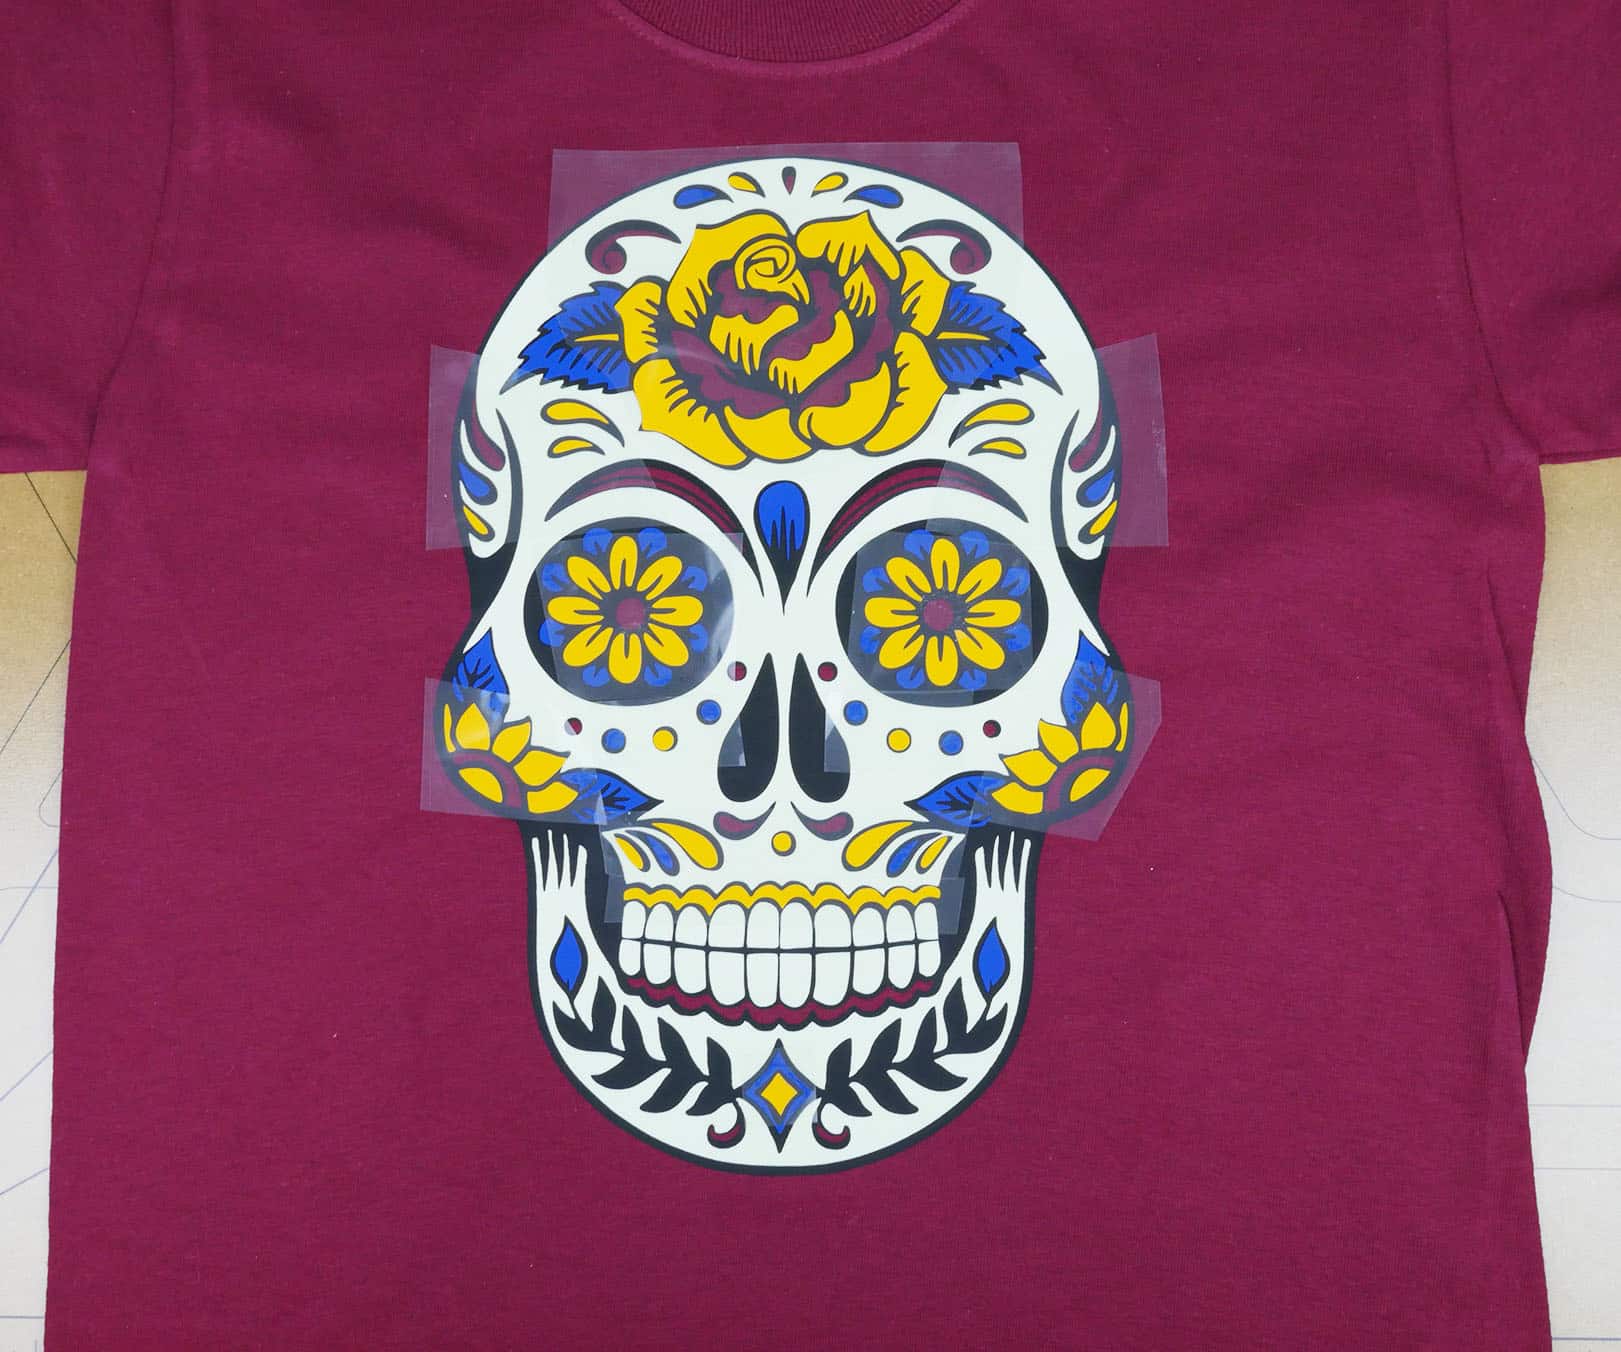
Step 2: Press the ThermoFlex® Plus Base Layer
Make sure your press is up to the correct temperature and pressure!
Temp: 330° F
Time: 8 sec*
ThermoFlex® Plus is a medium pressure press. I pressed for only 8 seconds instead of the usual 15- this is because I wanted to ensure the carrier didn’t leave any marks on the lower layers.
Black is pressed on first as a base. The dropouts ensure we have a 3rd color in the skull without needing extra material. I think he looks kinda cute here!
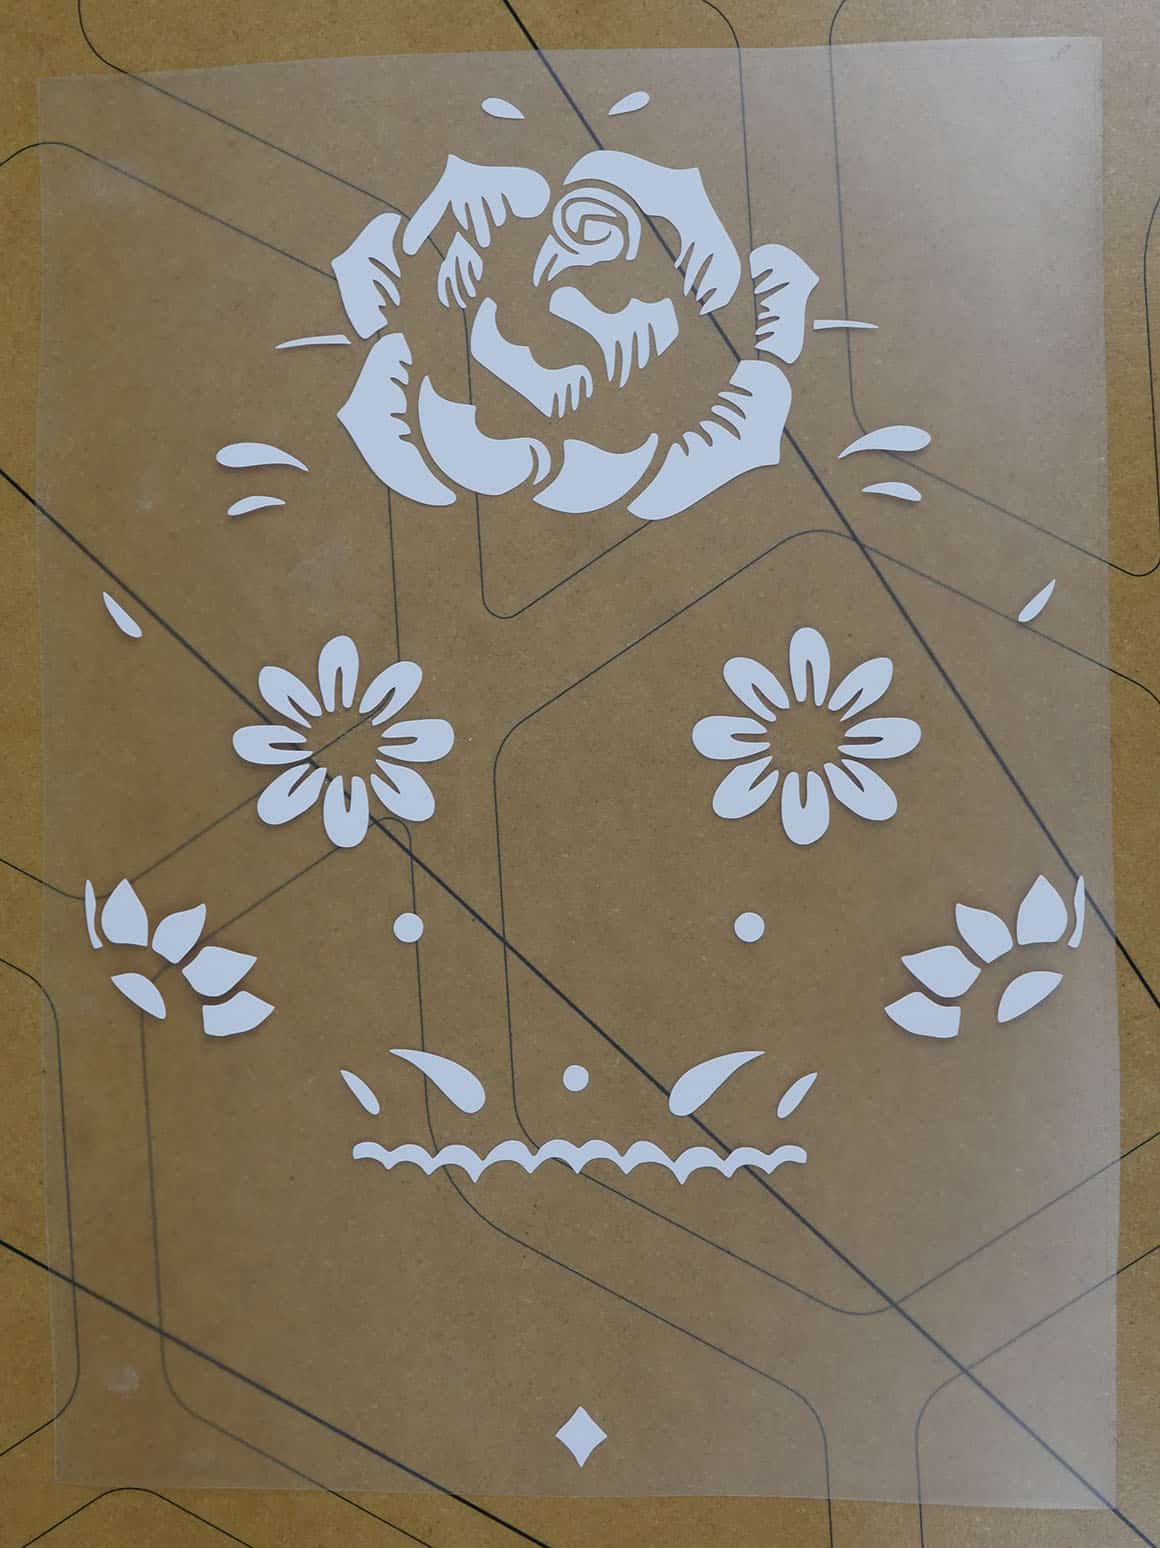
Step 3: Press the LuminousFlex™
Next is our LuminousFlex™. LuminousFlex™ presses at
Temp: 320° F
Time: 8 sec*
Again, using 8 seconds instead of the full press time of 17-20 seconds to reduce the appearance of carrier marks.
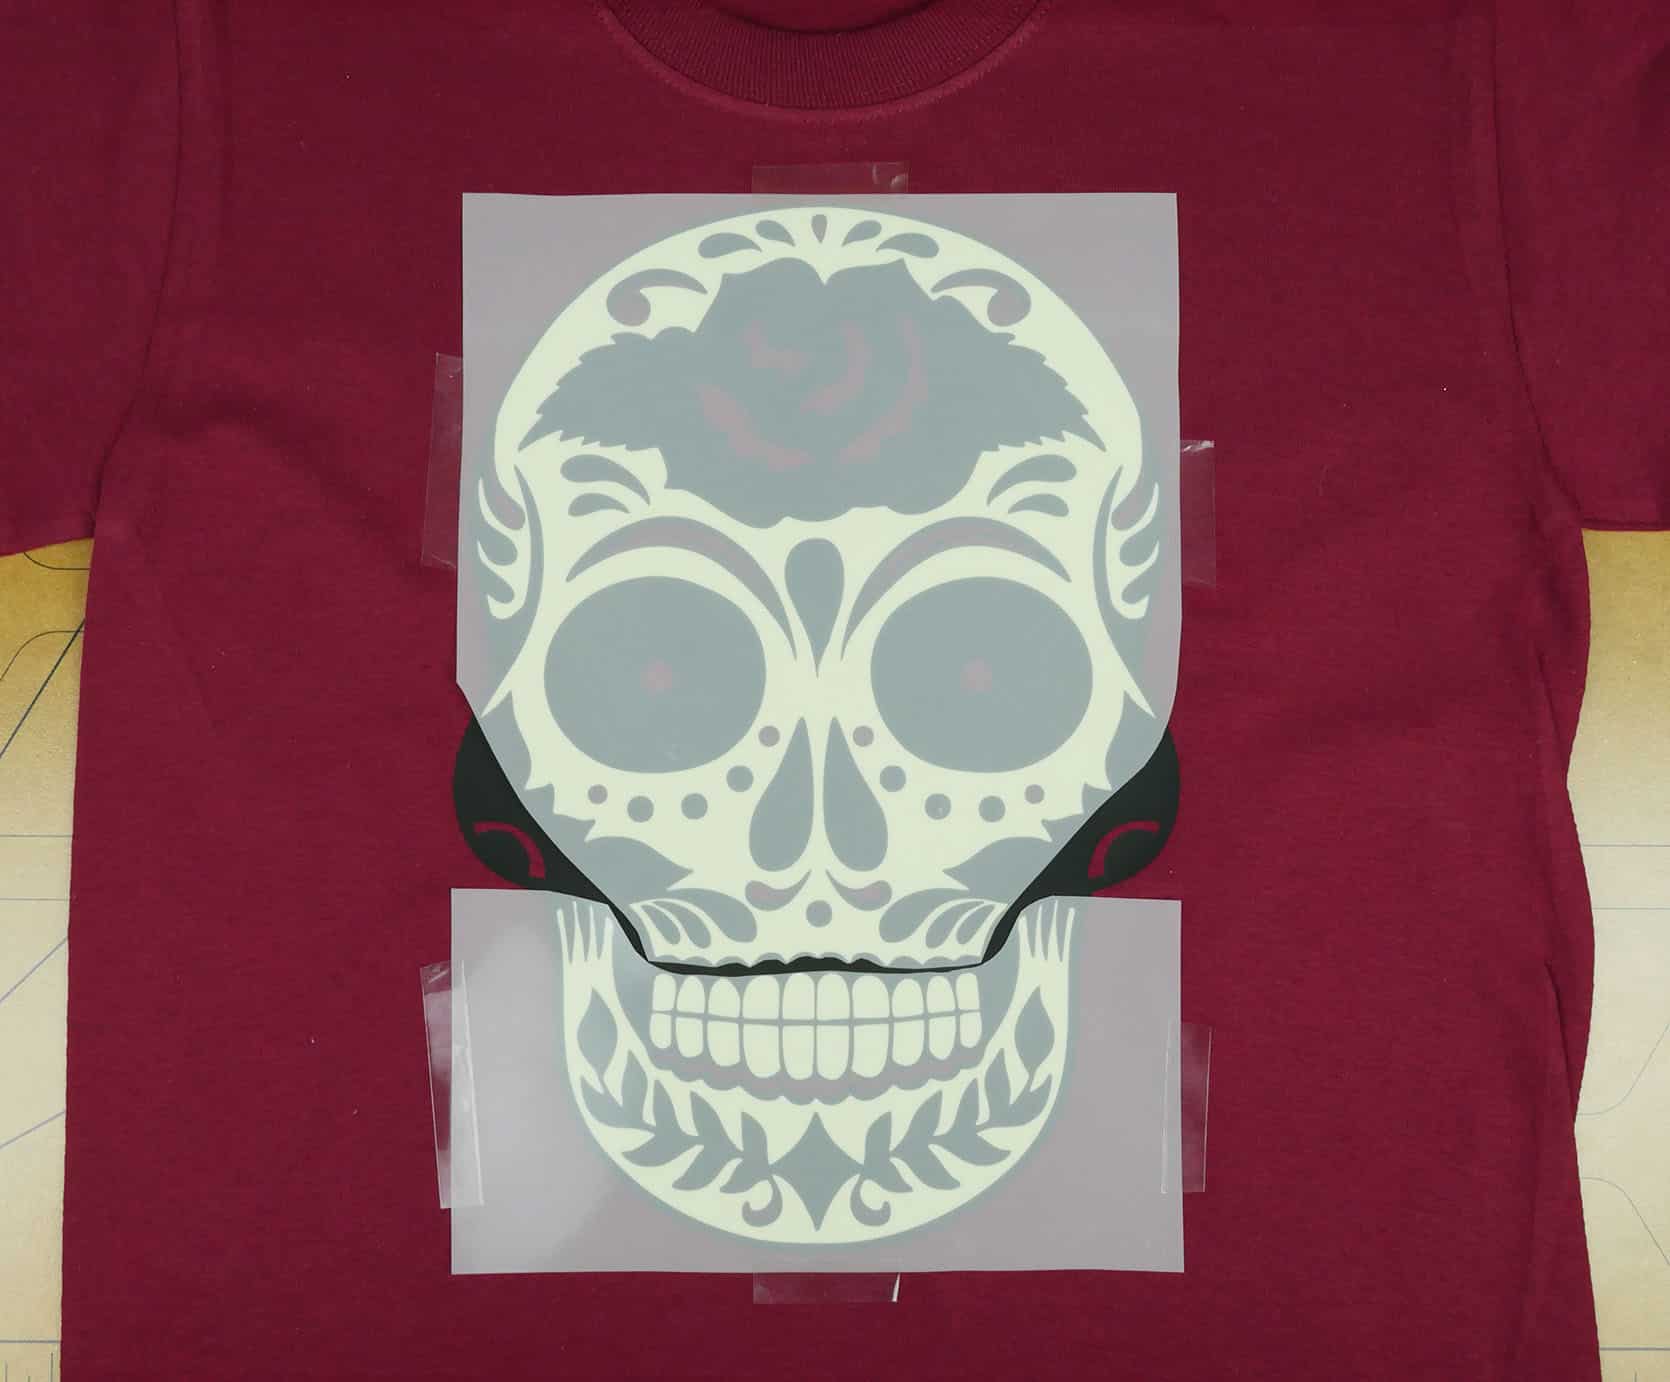
By placing the skull as our next layer, it helps to ensure a guideline of where the next two layers should lay. I’m a perfectionist, so I’ve cut my carrier where the skull separates- this allows me a more precise placement!
Sometimes in removing the carrier from the layers, it can shift the base a little. You can help fight that by placing a still sticky carrier inside the shirt to help pull it from the back. However, seeing as this design has more than a few layers and lots of little bits and pieces, I personally prefer to cut things out. Play it by ear and see what works best for you!
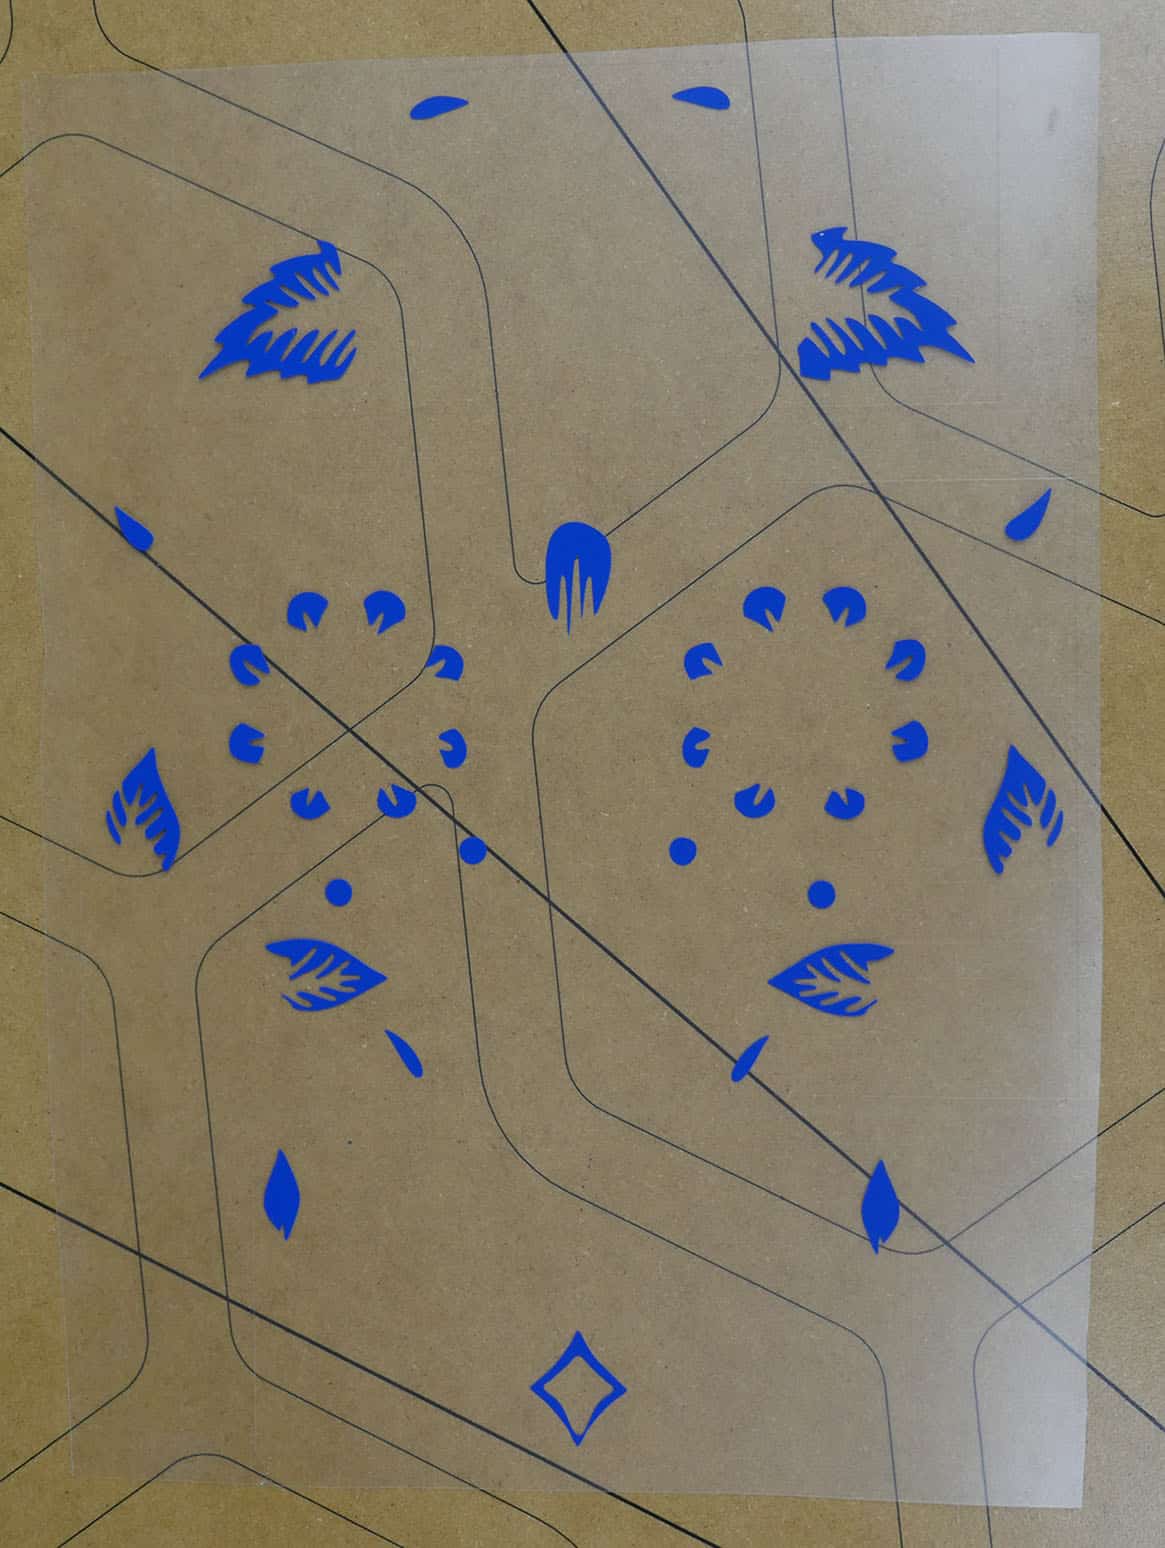
Step 4: Press the Final ThermoFlex® Plus Layers
After the LumionusFlex™, crank it back up to 330° for the last two layers.
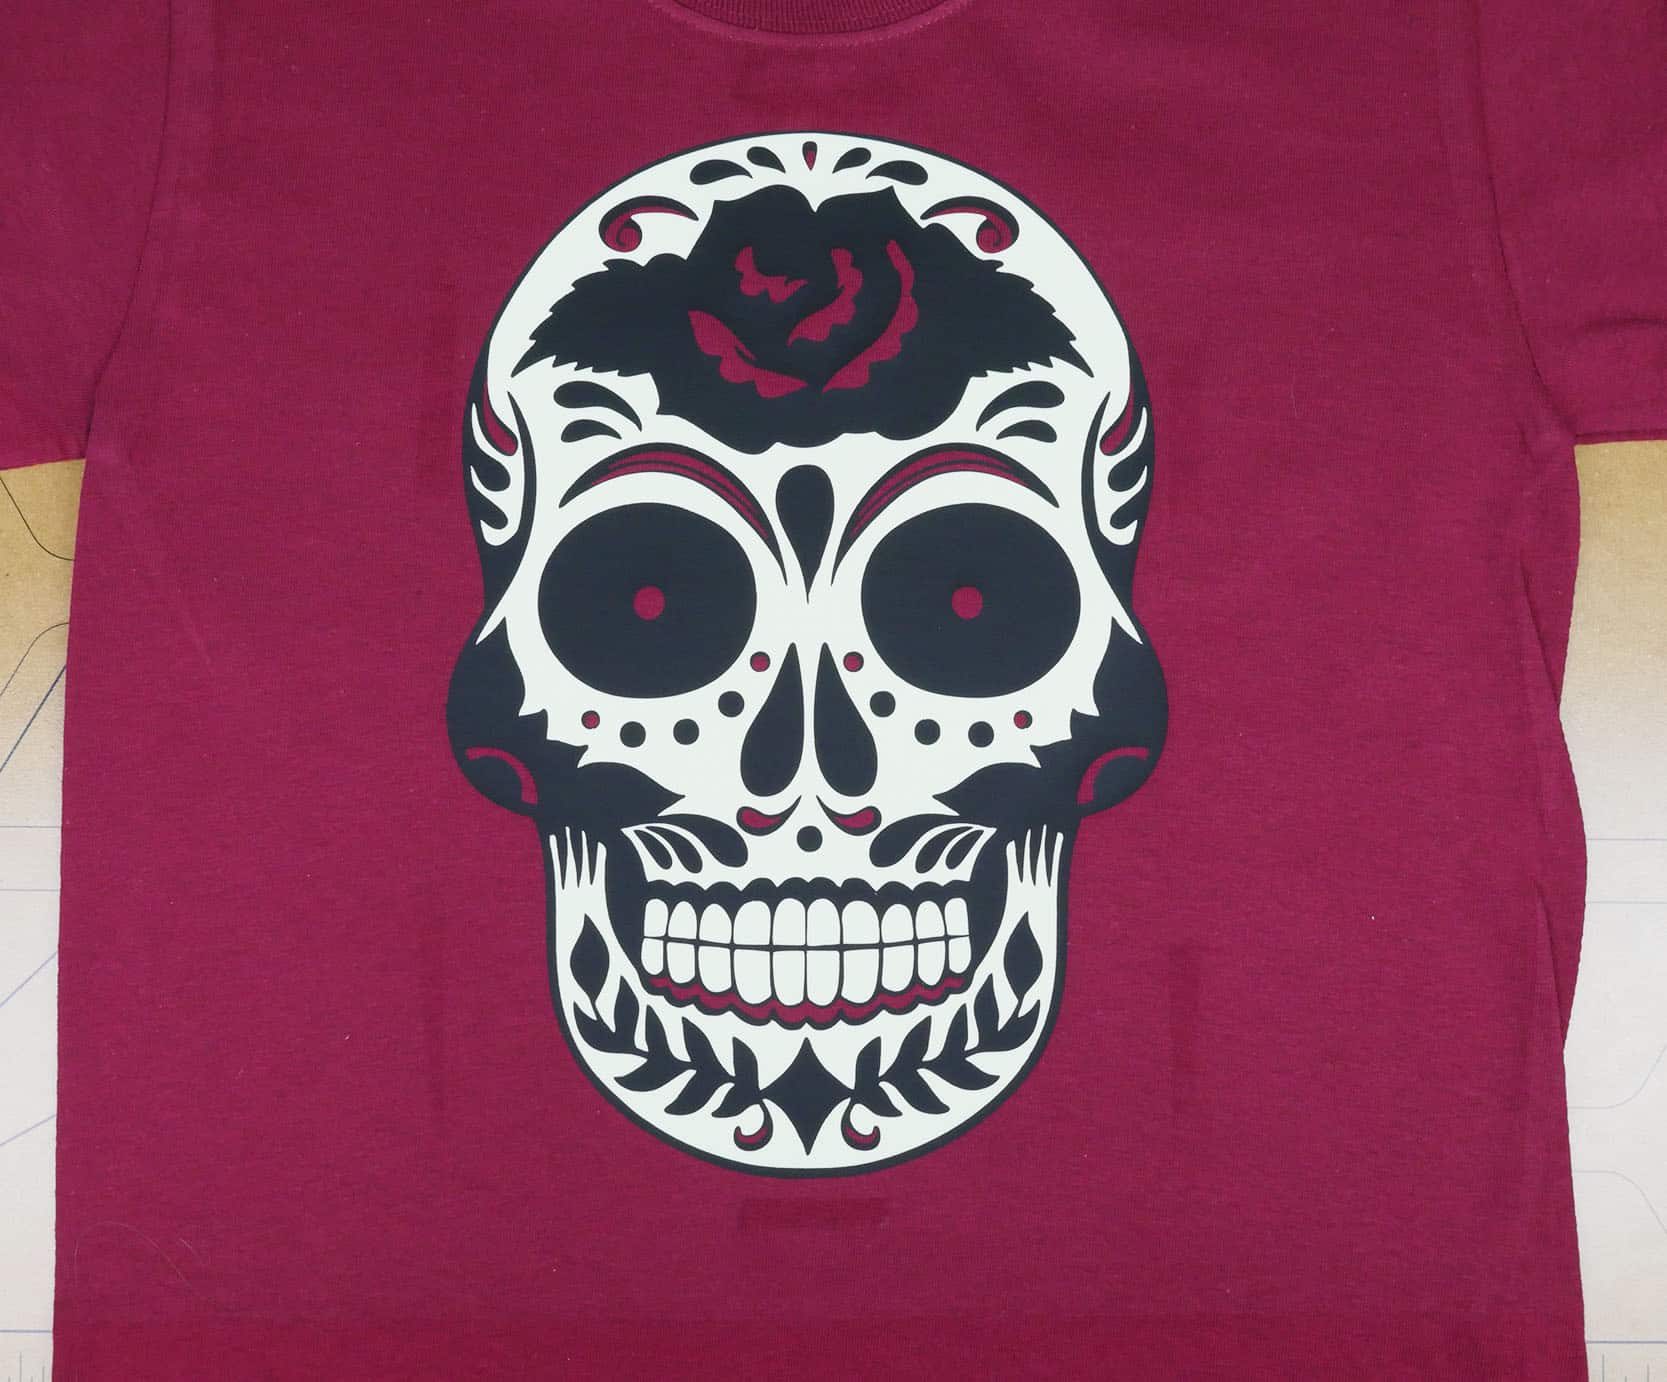
I pressed the blue first, then the yellow. As you can see, no layers touch anything but the black ThermoFlex® Plus- LuminousFlex™ should not be layered so it can still glow. This workaround gives you an intricate looking shirt while still keeping that super awesome glow!
After your last layer, I pressed with a PTFE sheet for an additional 8-9 seconds so the last layer can fully adhere and work out any carrier lines if there are any.
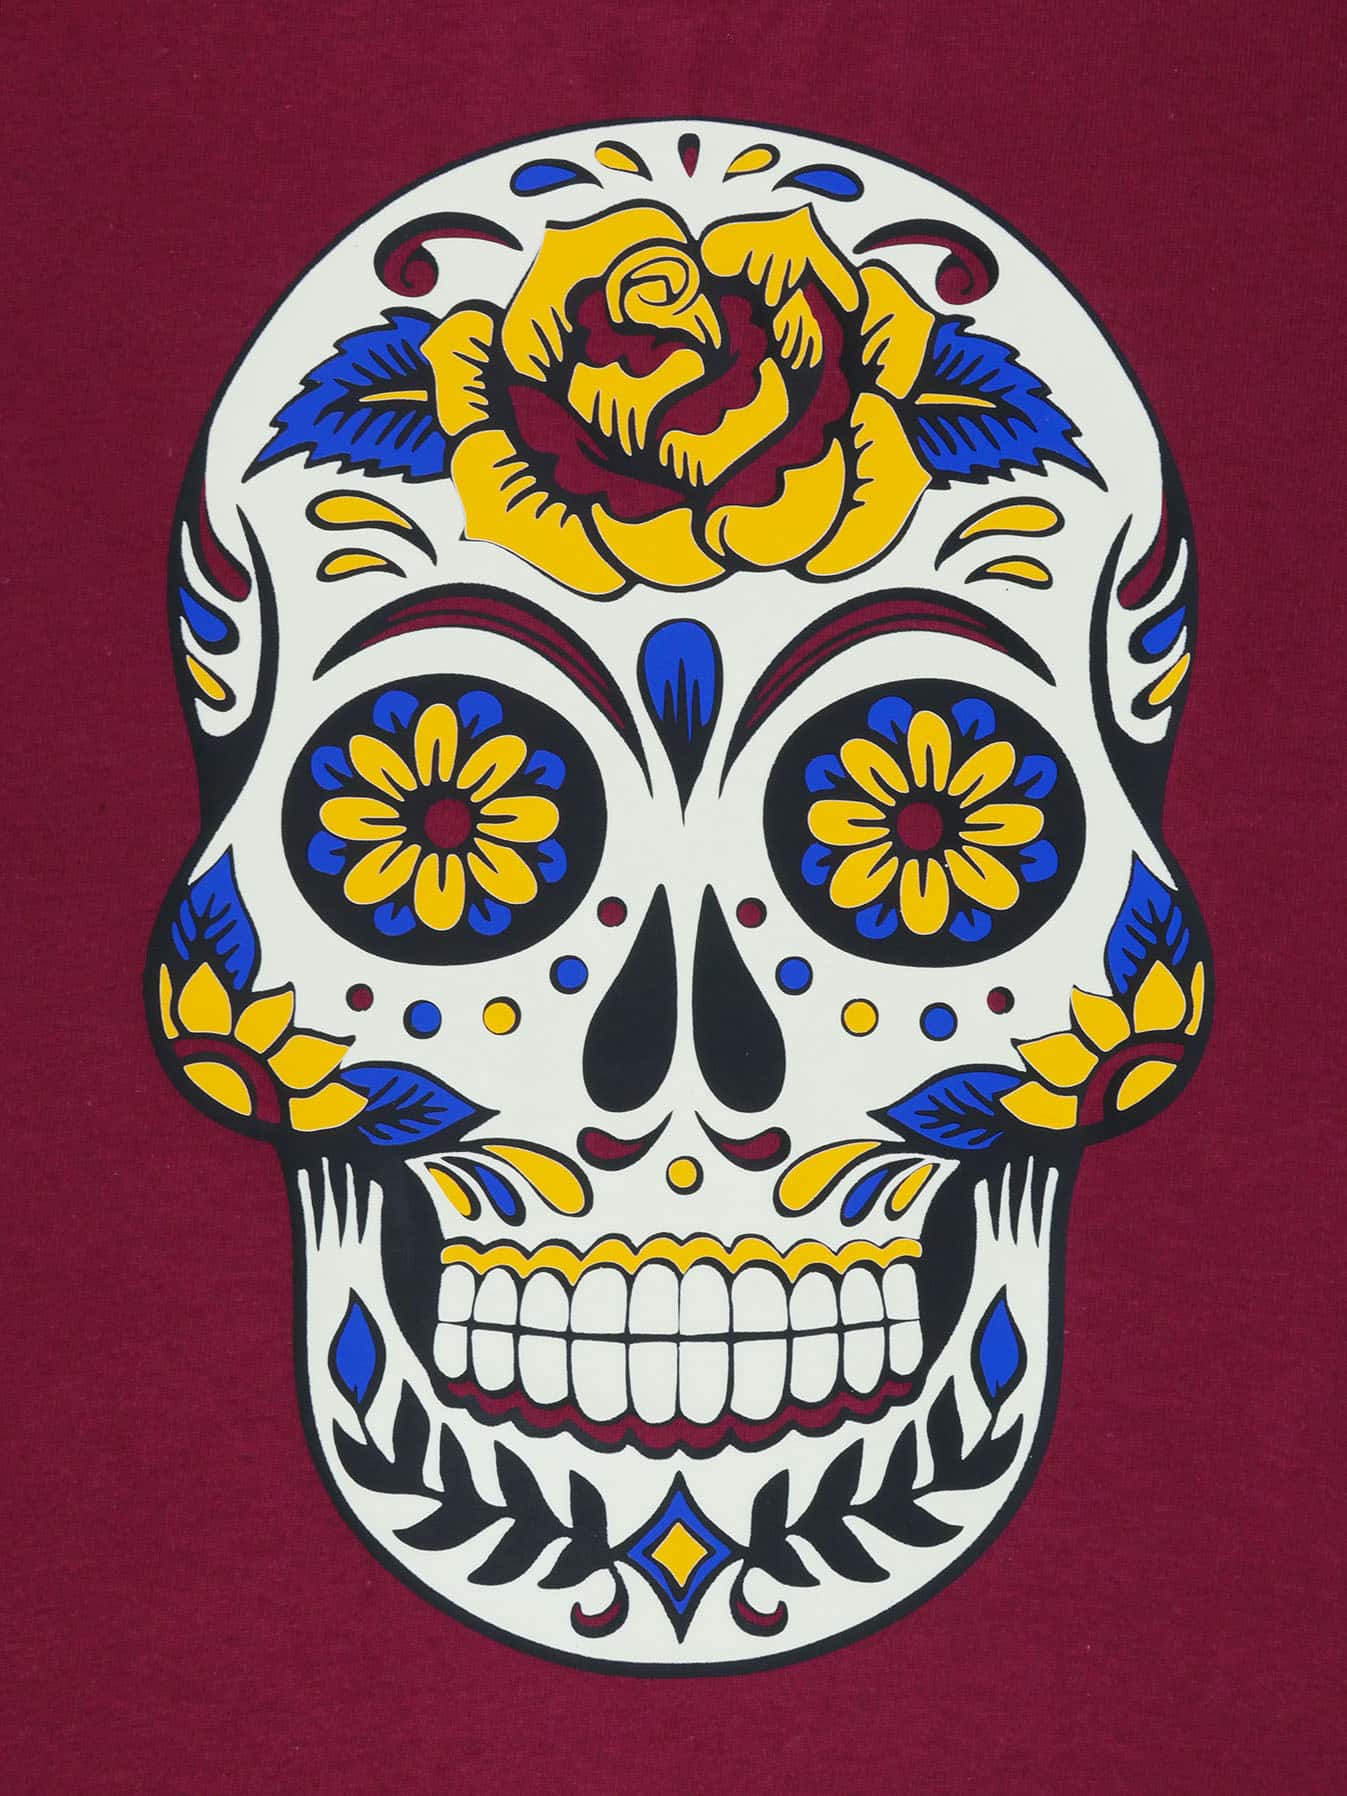
And there you have it, our sugar skull! I hope you’ve enjoyed this DIY post and that it’s helpful to you.
Questions? Comments? Message us over on Facebook and we’re happy to help! If you use this file and you upload pictures, please tag them #lovewhatupress! We always love seeing what you make with our products.
We hope this has been helpful and informative. As always,
Lovewhat you press! ®
Like this blog post? Share it with friends!
Subscribe to our Mailing List
Want to be in the know about our latest products and colors? Sign up for our mailing list!