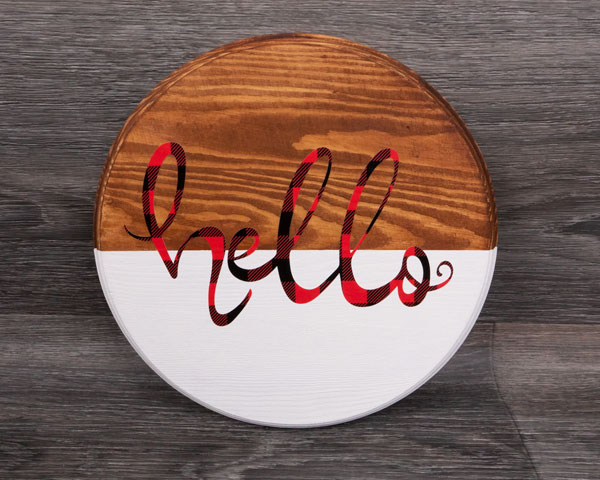
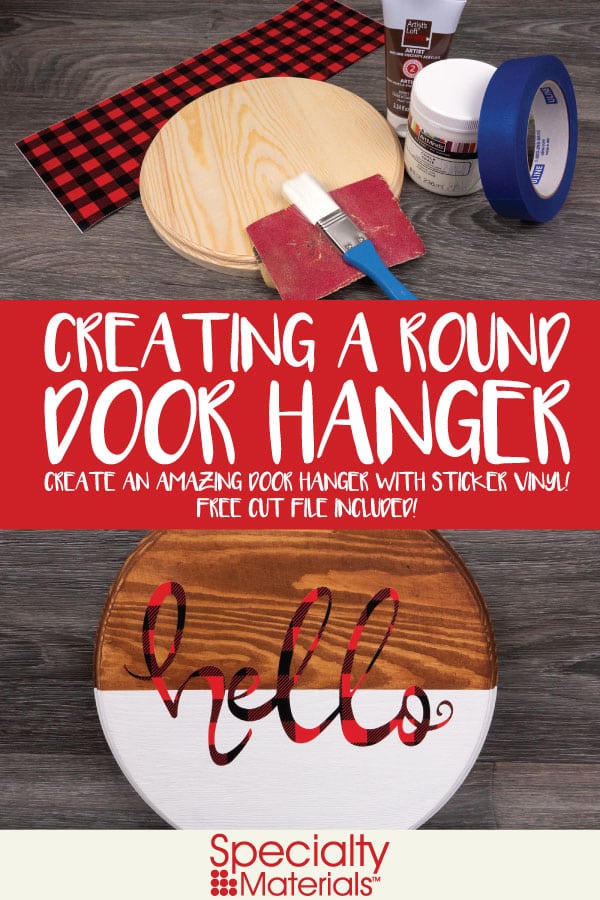
Wooden round door hangers are all the rage right now and with SpecialtyPSV™ Fashion Patterns your door hangers will really POP! They’re easy to make, they just take a little time, a little paint, and a little patterned sticker vinyl.
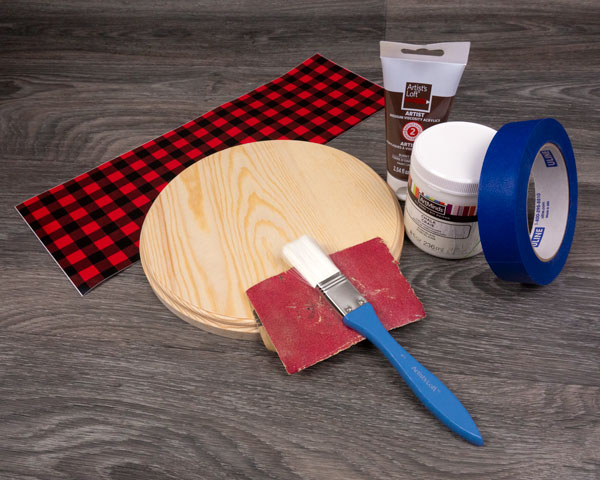
Paint & brush- we used white chalk paint and brown acyrlic
Wet wipes
Sand paper
Painter’s Tape
The first step to get started is to prep your wooden round. Let’s get started!
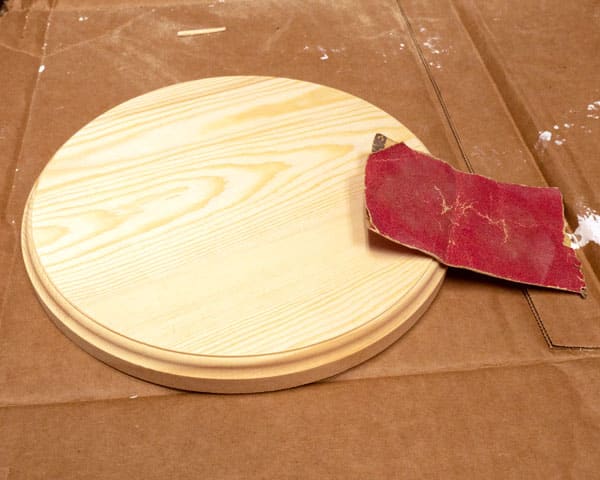
Step 1: Sand and paint your wooden round
The first step on your door hanger journey is to get the wooden round prepped and painted. It’s best to do this step first as you’ll have to wait for a few coats of paint to dry before applying your sticker vinyl. We used SpecialtyPSV™ Fashion Patterns but we would also recommend our amazing Pressure Sensitive GlitterFlex® Ultra if you want some sparkle!
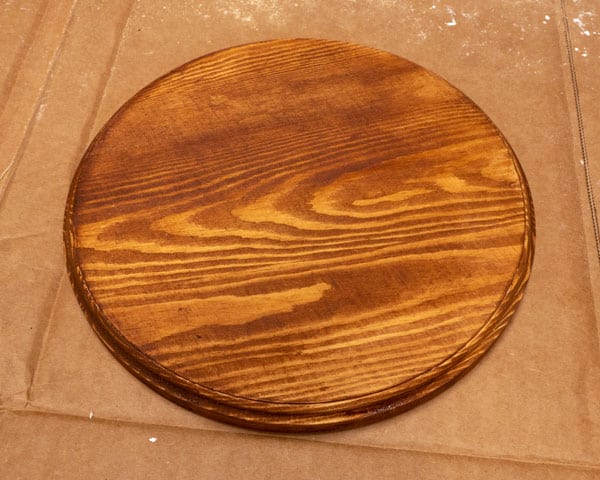
To get started, it’s best to sand down your wooden round. Most raw wood products will have a rough edge or two, so grab some sandpaper and get to sanding!
Our wooden round was pretty good to start with- it just needed a little work with some medium grit sand paper. Follow that with some fine grit and then you’re ready to move onto painting!
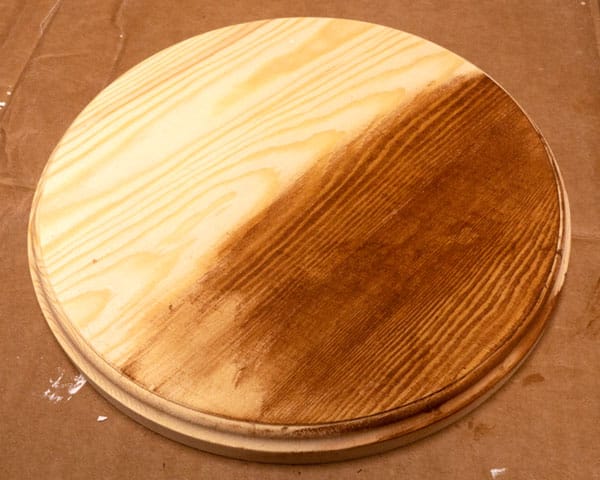
We first stained our wood using acrylic brown paint and a wet wipe. We first talked about this process in our blog post Creating a Reverse Canvas and then Pressing A Design Onto Wood– the idea is the oils in the wet wipe really help the paint get into the wood. It’s a cheap and easy way to stain the wood with things you likely already have around the house!
We were happy with our wooden round after one coat, but if you want a darker stain wait until it dries and go over it again.
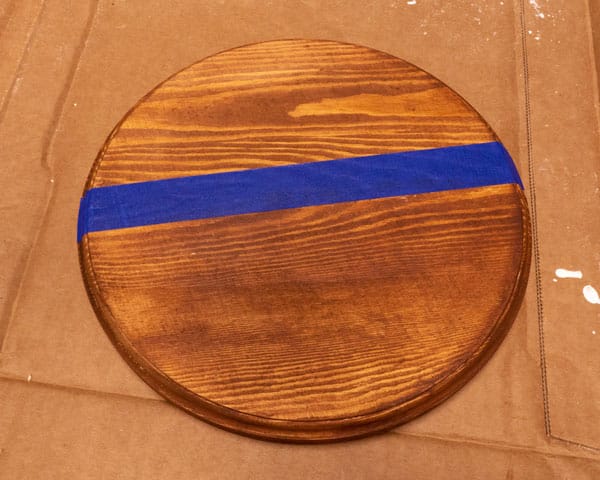
Your stain is completely dry, what’s next? Why, the white paint that’s what!
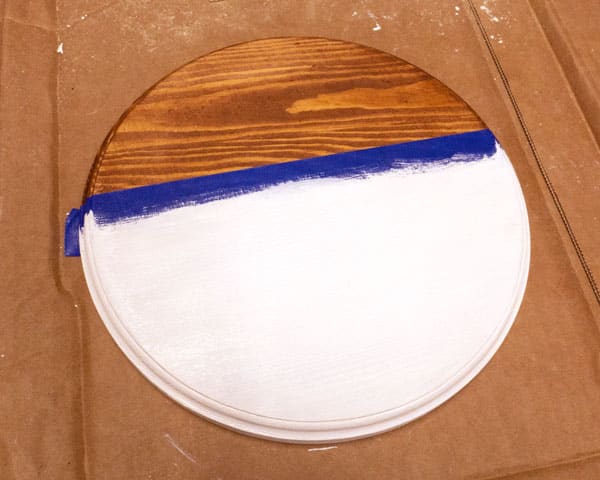
The first step is to make sure that your wooden round is taped off carefully with painter’s tape. We wanted our painted half to be just a bit larger than the stained half, so we went a bit above the middle with our tape. Make sure that you very carefully place the tape down and either run your finger or something stiff like a credit card along the edge. The reason we do this is to make sure there are no tiny little bubbles or spaces between the tape and the wooden round. This will keep our lines crisp and sharp!
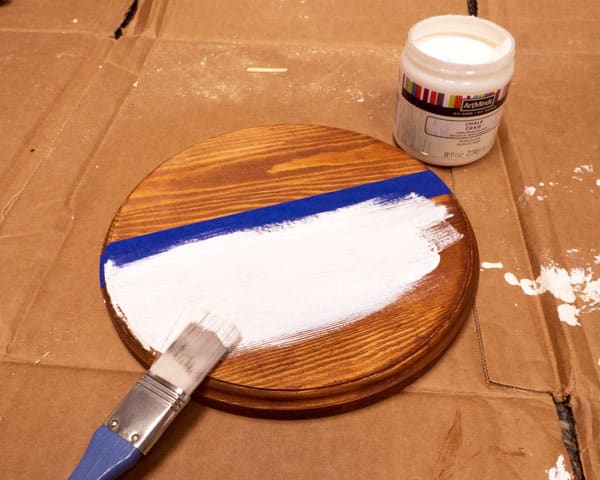
For our paint, we used white chalk paint. Chalk paint has a very good opacity- it was pretty opaque in just two coats! This project is yours to do with what you like, so use whatever paint suits you.
We found that our paint wasn’t opaque enough for our liking after one coat as you can see here to the left. Check the instructions on your paint for drying times and once that’s passed, go for a second coat! For our paint, that was approximately 2 hours.
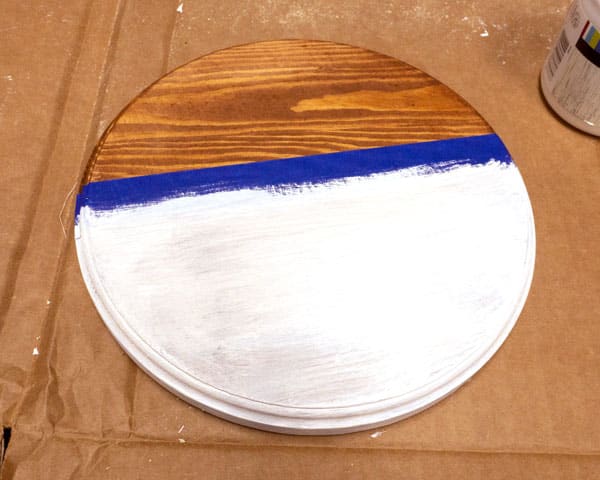
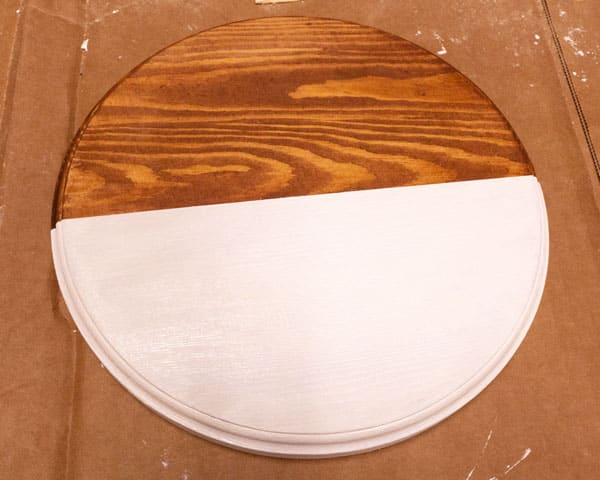
Once the second coat was applied, it looked great! It looked incredibly white but you could still see the wood grain on close inspection. We peeled off the tape while the paint was still wet- this is up to personal preference but we had good results with a careful wet peel.
Now that our wooden round is fully painted and the last coat is drying, it’s time to get our sticker vinyl cut!
Step 2: Cut Your Sticker Vinyl
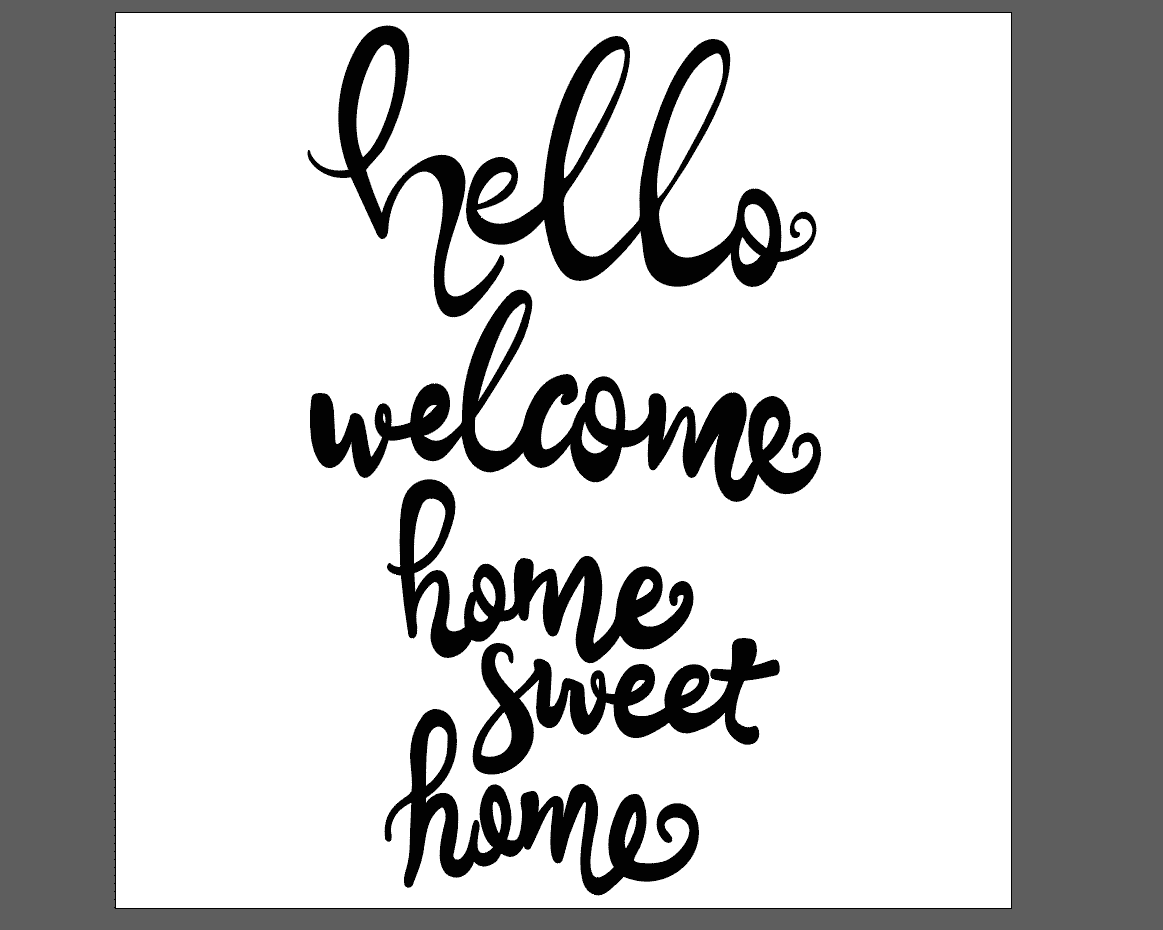
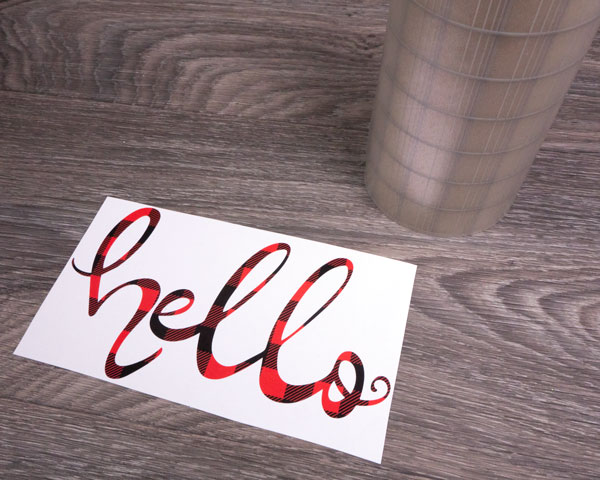
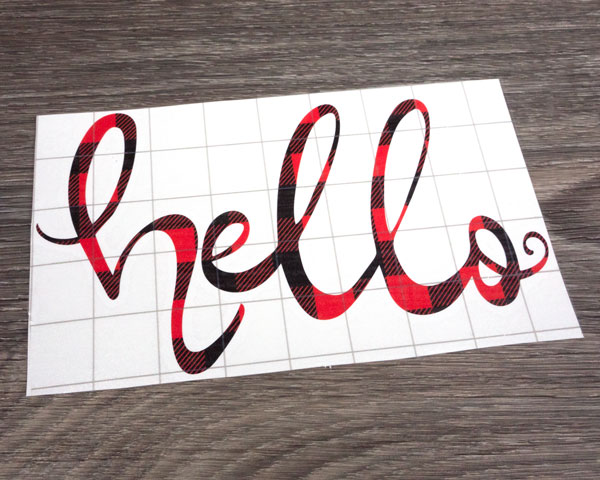
Our next step is cutting out your sticker vinyl. SpecialtyPSV™ Fashion Patterns is a fantastic choice for this project- it’s extremely durable, comes in over 30 patterns, and is very easy to use! Looking for the right cut file can be hard to do, so we’ve got you covered with this free one. Our Door Knocker Pack has three different words and phrases that are perfect for this project. We used the “Hello” but use whichever one works best for you.
Once you got this cut file download, let’s cut out the material! Do NOT forget that sticker vinyl needs to be cut right reading- as in DO NOT flip it! With our SpecialtyPSV™ Fashion Patterns, you can cut it at:
Product
Cricut
Silhouette
Graphtec
SpecialtyPSV™ Fashion Patterns
Material: Iron-On
Pressure: Default
Blade: Fine-Point Blade
Material: Heat Transfer, Smooth
Blade: 2
Speed: 8
Force: 6
Speed: 8
Force: 12
We use a 45° blade.
DO NOT forget your test cut! These cut settings are a suggestion for a starting point, as your machine is going to vary a little bit due to the blade. After your test cut, be sure to measure the space you’re using. Our wooden round was on the smaller side- around 9 inches. We gave it about a half an inch on both sizes, making our design 8 inches wide.
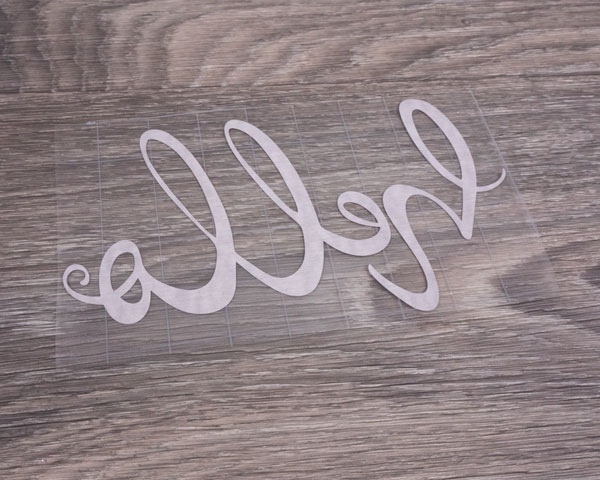
Once you’ve test cut, measured your space, and cut out your design, it’s time to mask! You can use 3 different transfer masks for this- Transfer & Seal Special Application Tape, TM-853, or TM-854. All of these transfer materials are around medium tack, which works perfectly for smooth sticker vinyl like this. If you use something textured like Pressure Sensitive GlitterFlex® Ultra, then you’ll want a mask with high tack. HFIX-FLCK HotFix Transfer Mask is your best bet- an uneven glitter surface can be harder to mask so you need all the stickyness you can get!
After you have your design masked, carefully peel it away from the paper backing, leaving you with your sticker vinyl ready to go! If your wooden round is try, it’s now time to finish our door hanger.
Step 3: Apply Your Sticker Vinyl
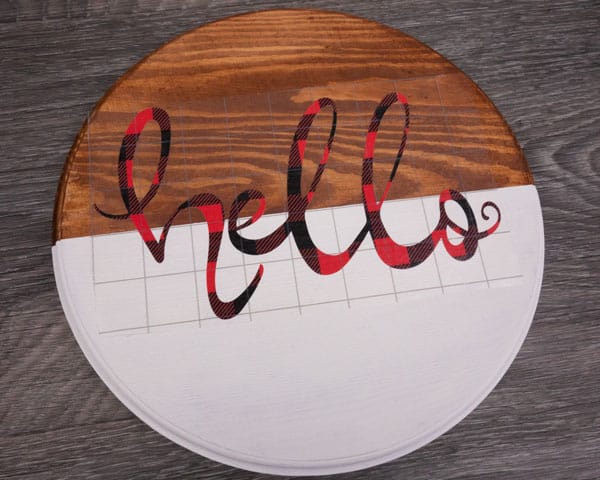
We’re almost there! All we have left to do is to apply the sticker vinyl. Carefully take your masked vinyl and hold it over the round until you find a place you like for it. We liked it roughly about the middle as you can see above. Slowly place it onto the wood and use a squeegee or your fingers to firmly press the vinyl onto the wood. Once it’s placed on, slowly remove your mask and voila!
We're done!
Isn’t your wooden door hanger the best? It’s time to decide how you’d like to display it- if you’d like to hang it, grab some twine and a staple gun to attach your twine to the back. You could also lean it against the wall on a shelf as part of the decoration. Some people love to decorate their door hanger further with bows- the sky’s the limit!
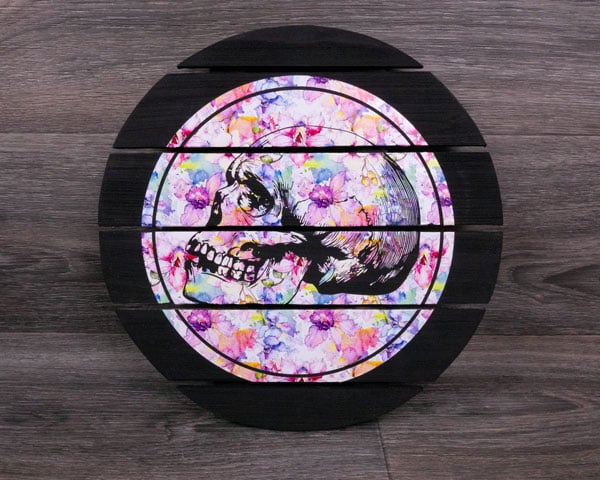
With SpecialtyPSV™ Fashion Patterns, you can decorate about any surface. We used the Pastel Flowers to decorate this round below- the possibilities are endless!
We hope you found this tutorial helpful and that soon you’ll be putting up your own door hanger! Please let us know what you think by messaging us on Facebook. Customized something using this tutorial? Tag your picture #lovewhatupress so we can see it! We might even feature it on our social media.
We hope you give this a try! We know that with this fun tutorial and our amazing line of PSV you’ll
Lovewhat you press! ®
Like this blog post? Share it with friends!
Subscribe to our Mailing List
Want to be in the know about our latest products and colors? Sign up for our mailing list!