Have you ever wondered how you could take your child’s artwork and turn it into a shirt? How about taking a handwritten note or signature and turning it into a custom mug?
Luckily for you, we’ll be covering exactly how to do this in this blog post! Get ready to learn. 🤓
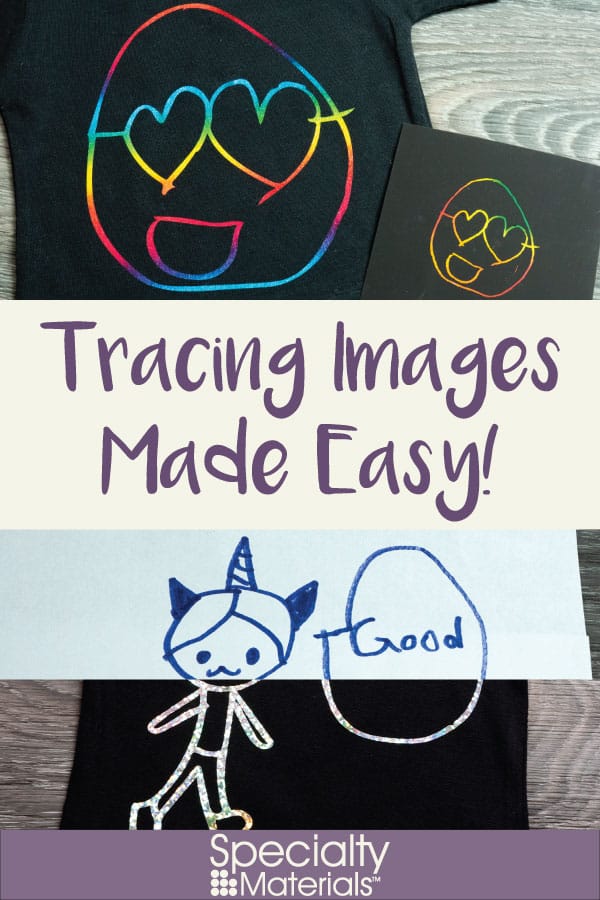
Tracing Images Made Easy
Skill Level: Easy to Intermediate, Depending on Image
To start, you need to pick out the image you want to be traced. For the best results, make sure the image has clear, thick lines. The app we’re about to use may have issues picking up details if the lines are thin or weak. As you can see, the image I’m using has thick, clear lines. The cleaner and bolder the image, the easier the trace!
Step 2: Trace Image Using Adobe Capture CC
I find the easiest way to create vector images from pictures and handwritten notes in real life is to use the Adobe Capture CC app. The wonderful thing about it is that it is free! Go ahead and download it.
When you’ve downloaded the app, we’ll be using the “Shapes” category.
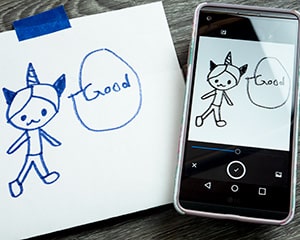
Press the camera button in the bottom right to use your phone’s camera to take a picture of your image. If you tap the screen, it will freeze and you can adjust how dark the image is. If you look at picture 1, you’ll see the trace is pretty great to start with!
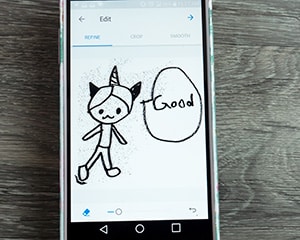
I increased the darkness (see picture 2) so I could get clearer lines. My trace was weak in the speech bubble area. It’s where the marker was weakest so it wasn’t capturing the lines as well.
Click the checkmark once you’re happy with your basic trace!
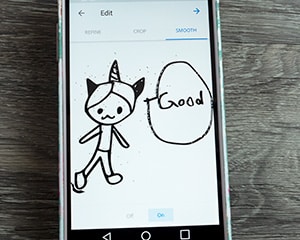
Step 3: Clean Up Your Trace
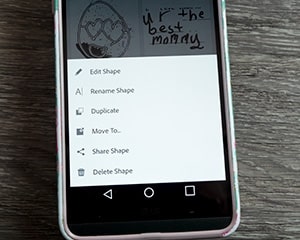
From here we edit! I cropped the image a little bit, used the eraser tool to clean it up, and used the smoothing tool to, well, smooth out the edges! It still needs a bit of work but now it’ll be much easier to edit. Click the arrow in the upper righthand corner to save your vector. If you use Adobe products like Illustrator, you can save it to your library and access it in all your programs! If you don’t use Adobe products, never fear!
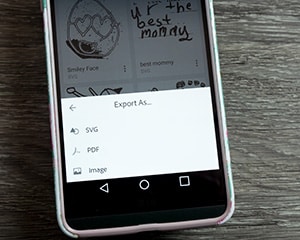
Save your image then click the three small dots near its name. From there, click Share Shape > Export As > SVG. Now you can easily import it into your program of choice!
Step 4: Clean Up the Image in Your Cutting Program
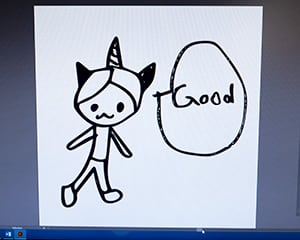
Your image will still probably be a bit messy. That’s okay! Import your image to the program you use to cut and design your decorations. For me, I use Adobe Illustrator but you might use Corel Draw, Silhouette Studio, etc. I first started by deleting all the messy little bits you can see in the first trace to get our cleaner version! Look how much a little deleting cleaned it up.
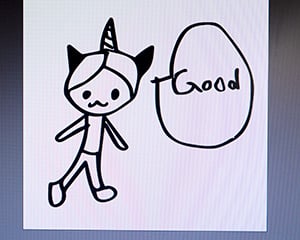
It’s looking pretty good, but I’d like to make my cut file a little simpler to weed. Next, I deleted all the small white bits inside of my black line to make it more uniform.
Now that looks like a great cut file!
Step 5: Go Crazy!
Once you have your vector just the way you want it, the possibilities are endless. Shirts, pillows, mugs, frames- whatever you want to cut this out onto, you can!
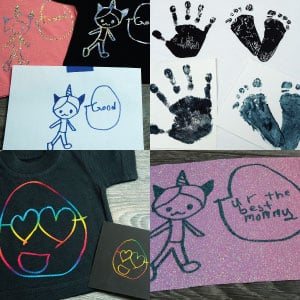
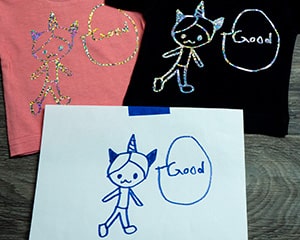
For this file, I cut it out in Silver DecoSparkle® (perfect for unicorns!) and added it to some mini-tees as an example.
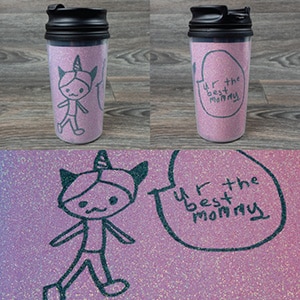
But you don’t have to stop there! You can even combine traces- I took our little unicorn girl but changed the text out with a cute handwritten note our little artist had written her mother. I then sublimated the image on Rainbow Opaque White GlitterFlex® Ultra to create a liner for this mug.
Here I traced a different image, used Rainbow Multi DecoFilm® Soft Metallics and pow! Your little one’s art is now a shirt they’ll be so proud and excited to wear.
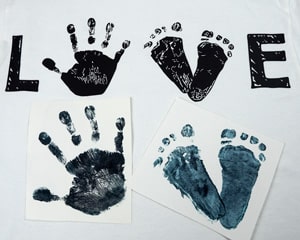
This last one required more cleanup and more weeding, but tracing the hand and footprints of a child to create a custom design is so worth the effort! The design is so very meaningful for parents which makes it a fabulous Mother’s or Father’s Day gift! I used Black ThermoFlex® Plus for this shirt.
I’m in love with this process- it always brightens everyone’s day to see their work or their child’s work brought to life in a wearable, usable fashion. I hope this helps you create wonderful custom creations of your own!
Please tag your work with #lovewhatupress so we can see what amazing things you create using this how-to! Don’t forget to pin this so you can easily refer back to it when you need it.
Lovewhat you press! ®
Like this blog post? Share it with friends!
Subscribe to our Mailing List
Want to be in the know about our latest products and colors? Sign up for our mailing list!